This guide will walk you through building your first workflow. The use case we’ll cover is creating a HelpDesk ticket for a bad rating happening in the chat.
To understand what workflows are in general, rewind to this article.
If you’re ready to start the configuration, read on!
Before we begin, here’s a short recap:
How do workflows work?
Each workflow consists of two main parts:
- Trigger: The event that starts the workflow (the "when this happens" part).
- Actions: The tasks that the workflow performs (the "do that" part).
You can create simple workflows with just one action, or complex ones with multiple steps and conditions. Our AI assistant can also help you design and optimize your workflows.
To understand triggers and actions in more detail, go to this article.
Before you start your workflow configuration:
- Make sure you have LiveChat and HelpDesk accounts set up.
- Ensure you have the necessary permissions to create workflows.
Step 1: Start a new workflow
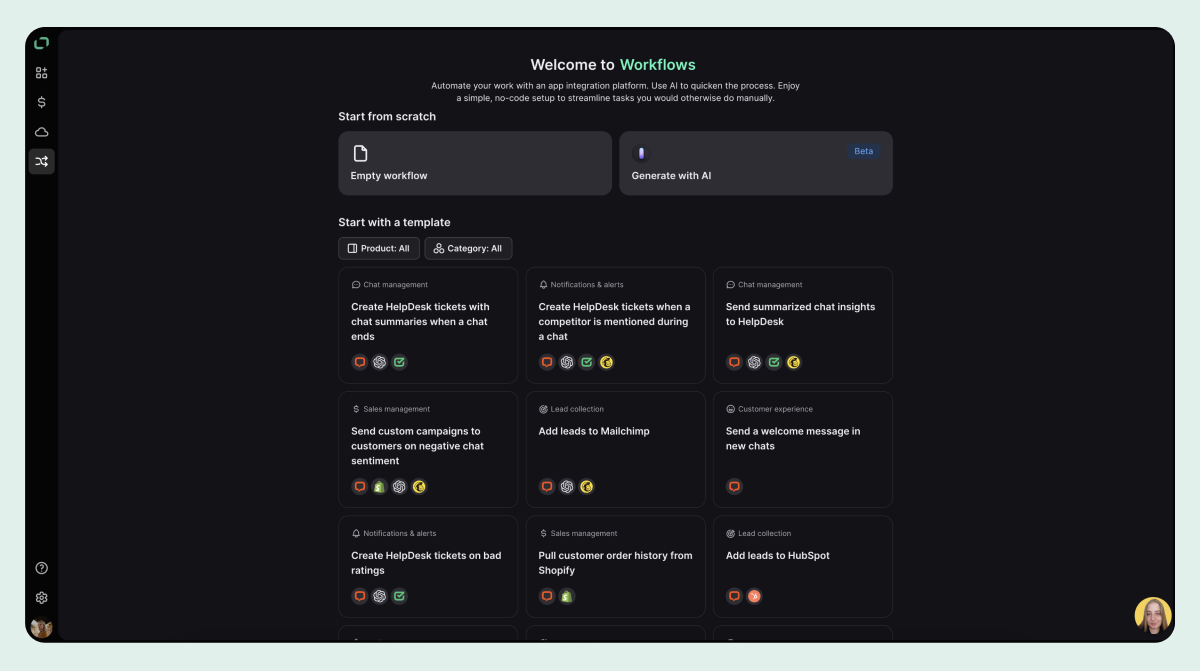
- From the Workflows interface, click on the “Create flow” button.
- You'll see two options: "Empty workflow" and the option to use a template. For this guide, we'll start from scratch with an empty workflow.
Step 2: Choose your trigger
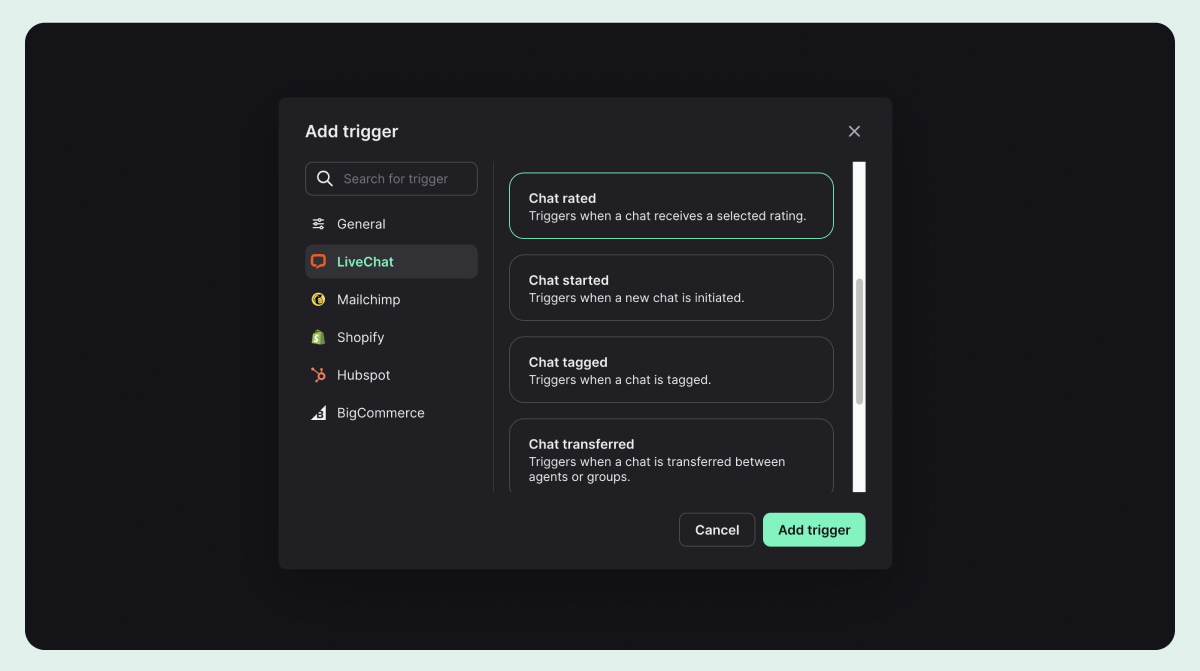
- Select the “+ Add trigger” button. This will be the event on which your workflow starts.
- In the trigger modal, select the LiveChat app from the application list.
- Choose the trigger event, which, in our case, is “Chat rated” and click "Add trigger."
- Click on the added trigger to open the trigger menu.
- Open the “Parameters” tab and select the “Bad” option from the “Rating” dropdown.
Step 3: Pull customer data
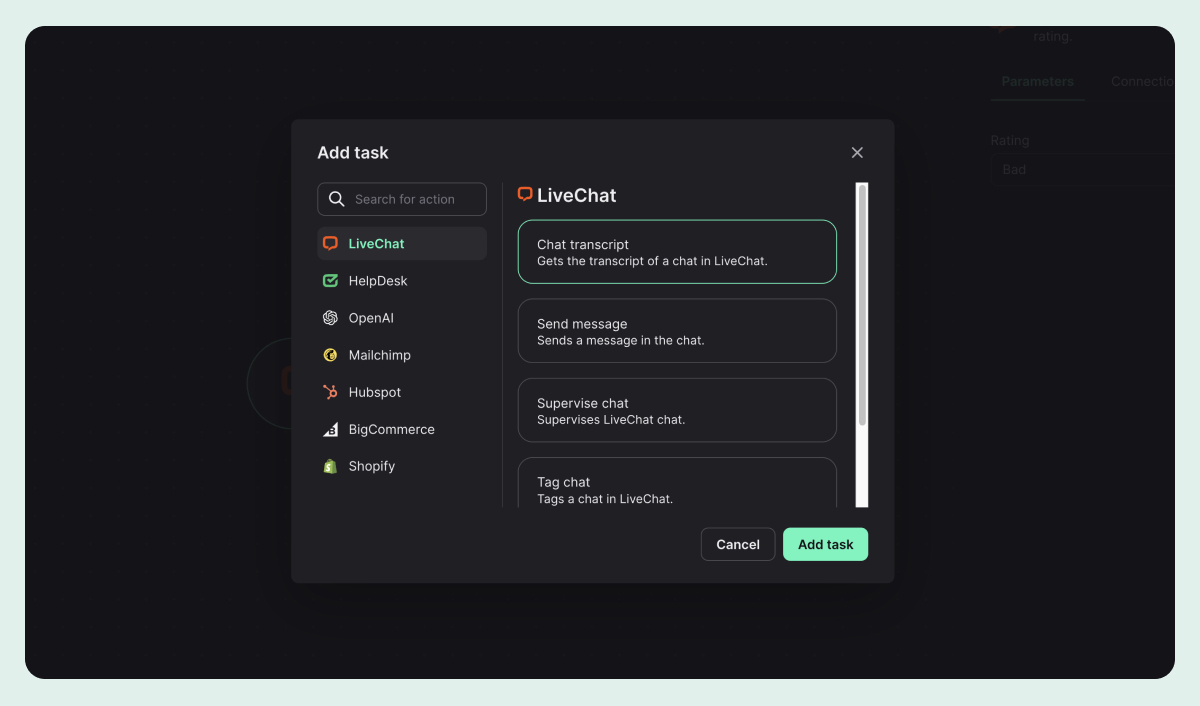
- Select the “+ Add task” button.
- Select the LiveChat application from the application list.
- Choose the action event “Chat transcript.” We need to pull this data in order to get the information about the customer for the ticket we’ll create.
- Click "Add task."
Step 4: Choose your action
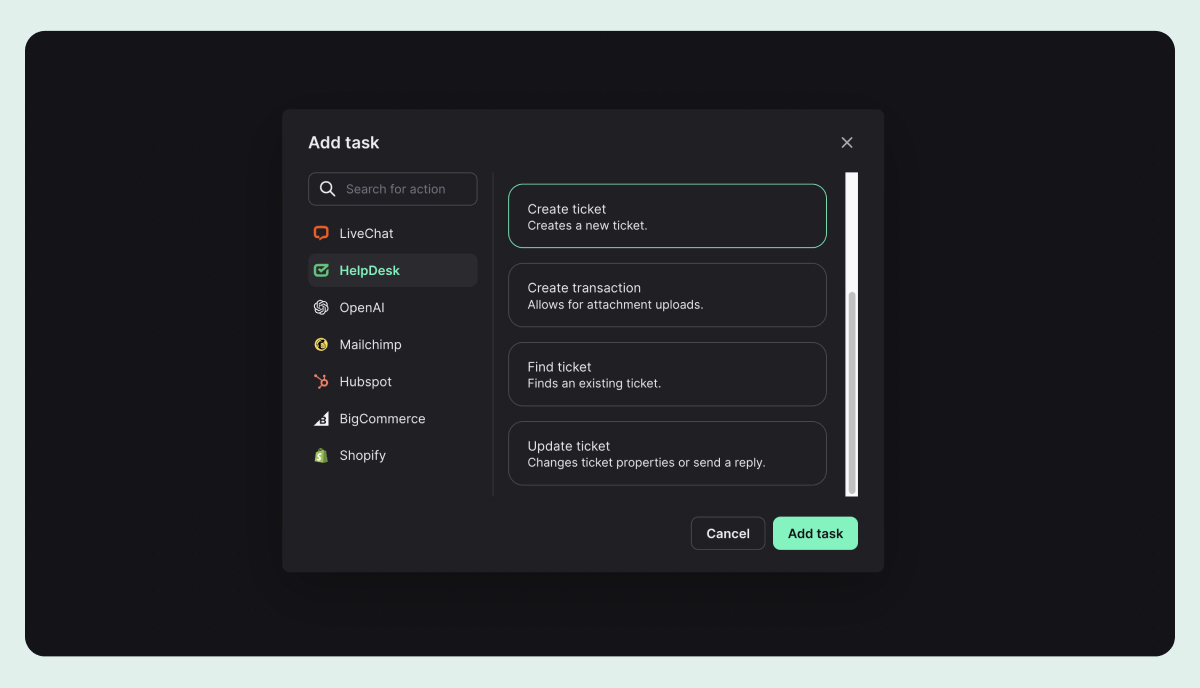
- Select the “+ Add task” button.
- Now, select the HelpDesk application from the application list.
- Choose the action event, which, in this case, would be "Create ticket.”
- Click "Add task."
Step 5: Fill in the task details
- Click on the added HelpDesk task to open the task configuration menu.
- On the right-hand side, you’ll see different fields that allow you to customize the details of your created tickets. The variables will be pre-filled automatically with data pulled from the previous tasks.
- Optionally, you can add a chat transcript to the ticket message by pressing the + button on the right side inside the “Ticket message” input field and selecting the “Chat transcript” variable.
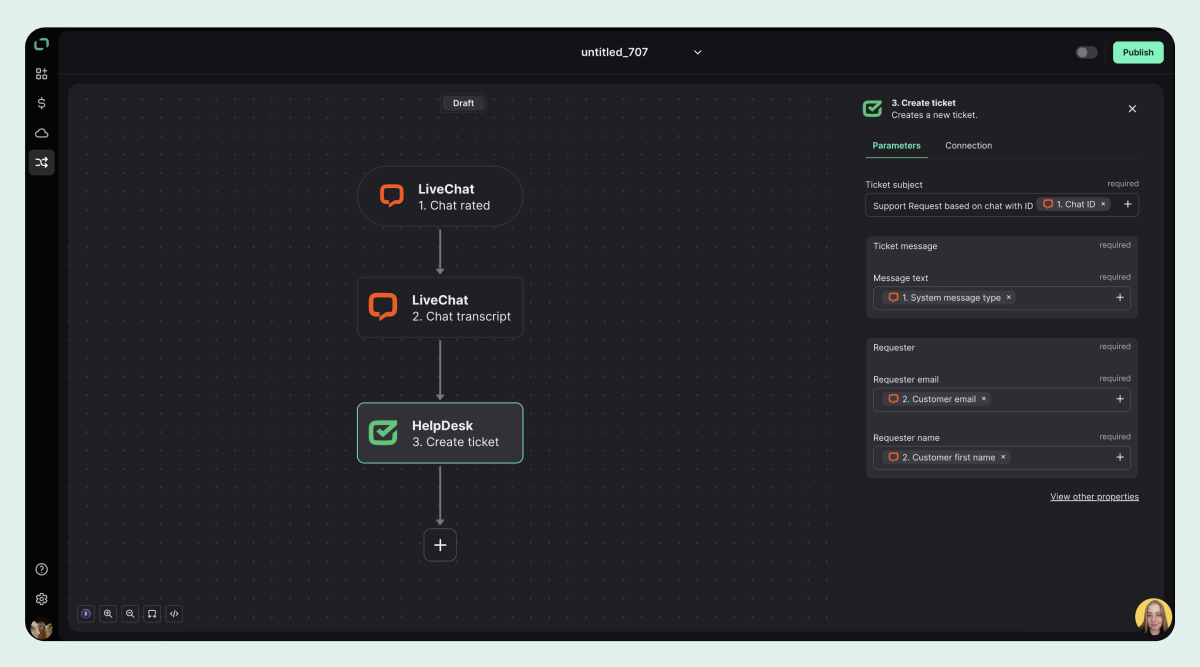
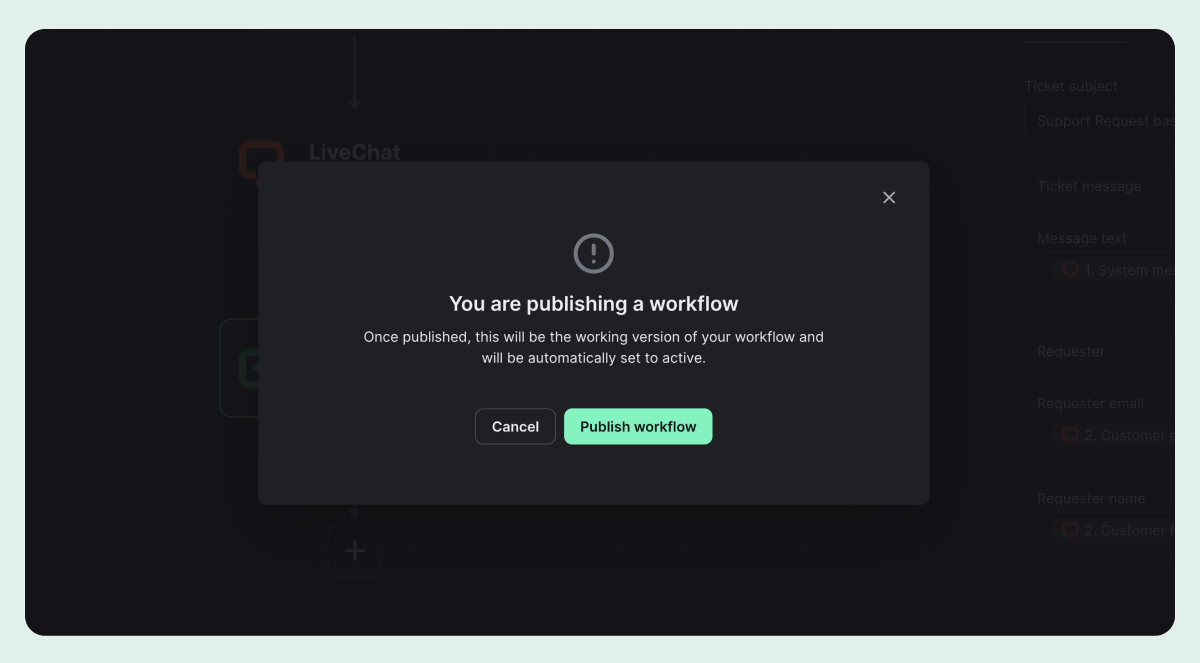
Step 6: Publish your workflow
- Click "Publish" in the top right corner of the page and confirm workflow publication. If everything looks good, your workflow will be published automatically.
Step 7: Name your workflow
- Give your workflow a descriptive name, like "Create a ticket for chats with a bad rating.”
Congratulations! You've created your first workflow. You can always come back to edit or adjust your workflow as needed.
All set with the basics? Go to this article to understand other Workflows functions you can use to customize your flows even better.
Create your workflow