New developers sometimes mix up the terms "Git" and "GitHub." While the two words correlate and refer to a version control tool, they're not the same. In fact, GitHub is built on top of Git, which is why its name includes this word.
Understanding the differences between Git and GitHub is vital for any developer who's interested in distributed version control, maintaining source code history, and working on open-source projects.
In this article, we'll explore the differences between Git and GitHub, what each is for, how to use them, and their pros and cons. By the end, you should easily be able to decide which system is best for your purposes.
What is a version control system?
To understand Git and GitHub, it's vital to know what a "version control system" or "version control tool" is.
When working on software, it's crucial to implement some form of source code management to avoid catastrophic bugs. For example, imagine you've got Version 1.0 of an app with 1 million active users. The users love the app but want some new features. You get to work, make extensive changes, add all the features, and then release it under Version 2.0.
Unfortunately, instead of being happy, your users are furious because an unforeseen bug crashed the app!
The easiest solution would be to immediately revert to Version 1.0. If you're using a version control system, you can simply roll back any changes, recompile Version 1.0, and immediately release it to your users.
The above example is oversimplified but shows the overall concept. In truth, a version control system is even more sophisticated than that, allowing you to monitor incremental source-code changes, prevent two people from working on the same file at once, and maintain a commit history of code-file modifications.
Such a tool is even more vital in open-source code projects or where users in different locations must work on a single codebase. In these cases, the version control tool also acts as a type of project management tool.
What is the Git version control system?
The Git tool is a distributed version control system developed by Linus Torvalds, the man who developed Linux. The tool comes pre-installed on Linux and macOS distributions. Natively, it works through a command-line interface (CLI), which takes some getting used to. More recently, developers have added GUIs on top of Git so you can execute Git commands by interacting with visual elements.
How is Git used?
The Git tool itself takes care of all source code management aspects through its command-line interface.
At its core, Git revolves around a Git repository. You can have a local or a remote Git repository, which is one of the major benefits of GitHub since setting up a remote repository on your own is quite complicated. GitHub provides a ready-to-use cloud hosting service for your GitHub repository, but we'll get into that in detail below when we discuss GitHub.
If you're on a Windows machine, you'll need to install Git from the Git website. If you're on Linux or macOS, it's a good idea to update your Git version to the latest version by following the instructions on the same website.
Once you've installed Git, you'll need to create a Git repository.
The "git init" command—setting up a Git repository
You can think of a Git repository as a virtual container for your project. The repository is central to maintaining version control, and it stores all the versions of your code.
As mentioned previously, creating a remote Git repository using Git is somewhat complex because you need to first set up the remote server to support Git. So, for the purposes of this article, we're going to create a local Git repository instead.
You create Git repositories using the git init command. You can optionally pass in the parameter of the directory that you want the repository to reside in. For example:
git init git-test
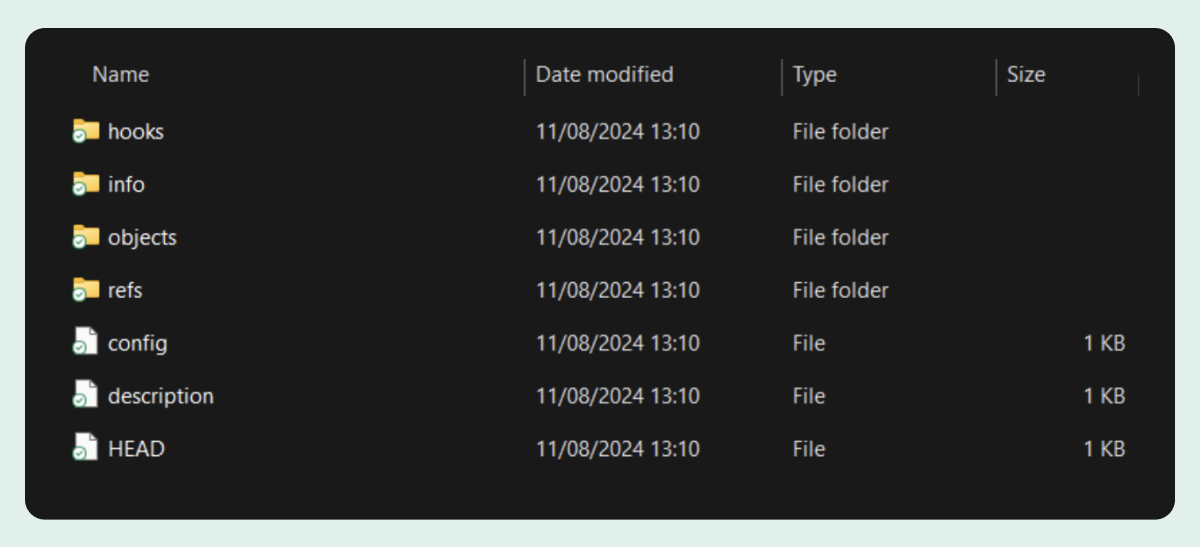
The Git command creates a ".git" folder that contains all the metadata necessary to perform version control on your code.
Adding and committing files to your Git project
Okay, so you have a Git repository. Now what? Well, we want to add files to it! You can go ahead and add all the files you need to this folder and then run the git add . command followed by the git commit . command from the top-level folder to commit all those files to the repository.
Note the period after add . and commit . This is necessary to add all the files. You can also add a single file by specifying it after "add" or "commit," for example:
git add <path> or
git commit <path>
In Git, the concept of "saving" a file doesn't really exist. You save your code files on your file system as you work on them. As far as Git is concerned, the version it has is the last version that was committed, not the one you saved.
Once you're done working on a file, you add it (which essentially adds it to a "staging" area within Git) and then you commit the add.
Git only adds the file to the repository when you commit it.
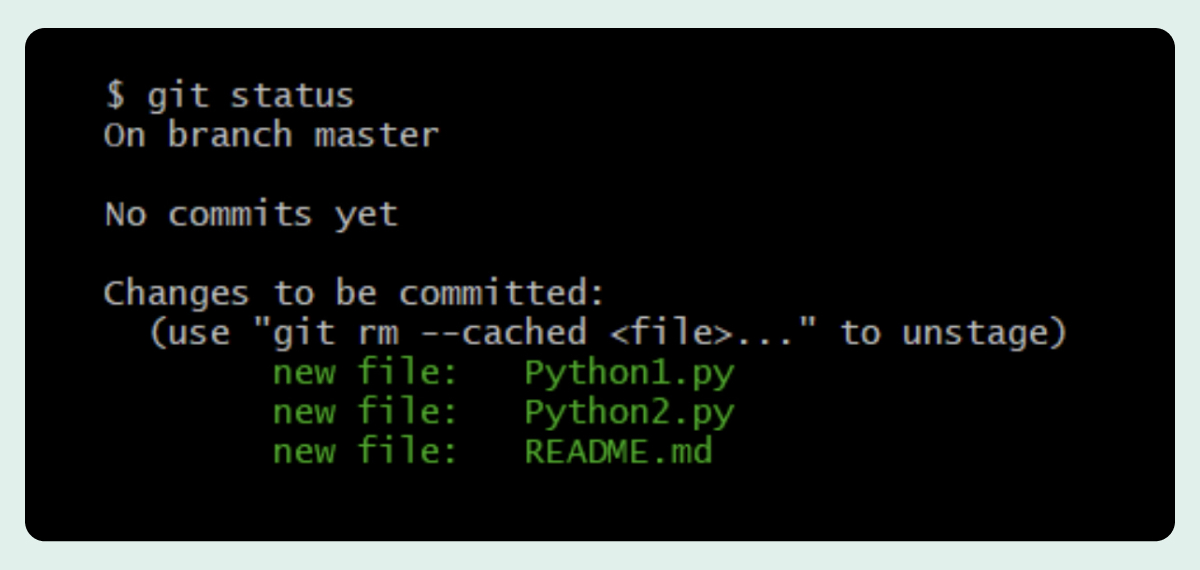
Let's imagine we've added two Python code files and a README.md file. We then run the git add . command in the top-level folder, which adds the files to a staging area. We can see what's going on by using another cool command: git status.
Running git status now shows us which files have been added and which need to be committed:
When issuing the git commit command, you must specify a message to be added to the commit. This maintains a record of committed changes. You specify the message by using the "-m" parameter:
git commit -m "New files added"
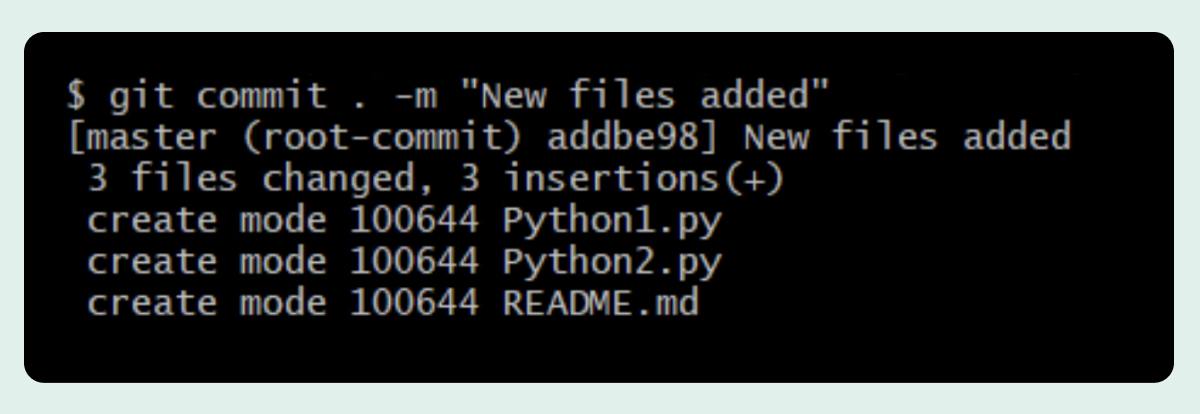
If you wanted to push your local changes to a remote server, you'd use git push after committing the files locally.
However, to ensure you don't overwrite someone else's commits, it's important to use git pull (explained below) before git push to ensure no conflicts exist.
As you can see, the commands can get complex quickly. As powerful as Git is, it does have quite a learning curve. Executing all the commands manually through the CLI is also somewhat cumbersome and affects a programmer's workflow, which is why GUI-based Git tools are so useful.
Here are some of the other essential Git commands. To learn all of them, you can refer to the official Git documentation.
Other basic Git commands
git show HEAD:<path>: This shows the contents of the committed file.

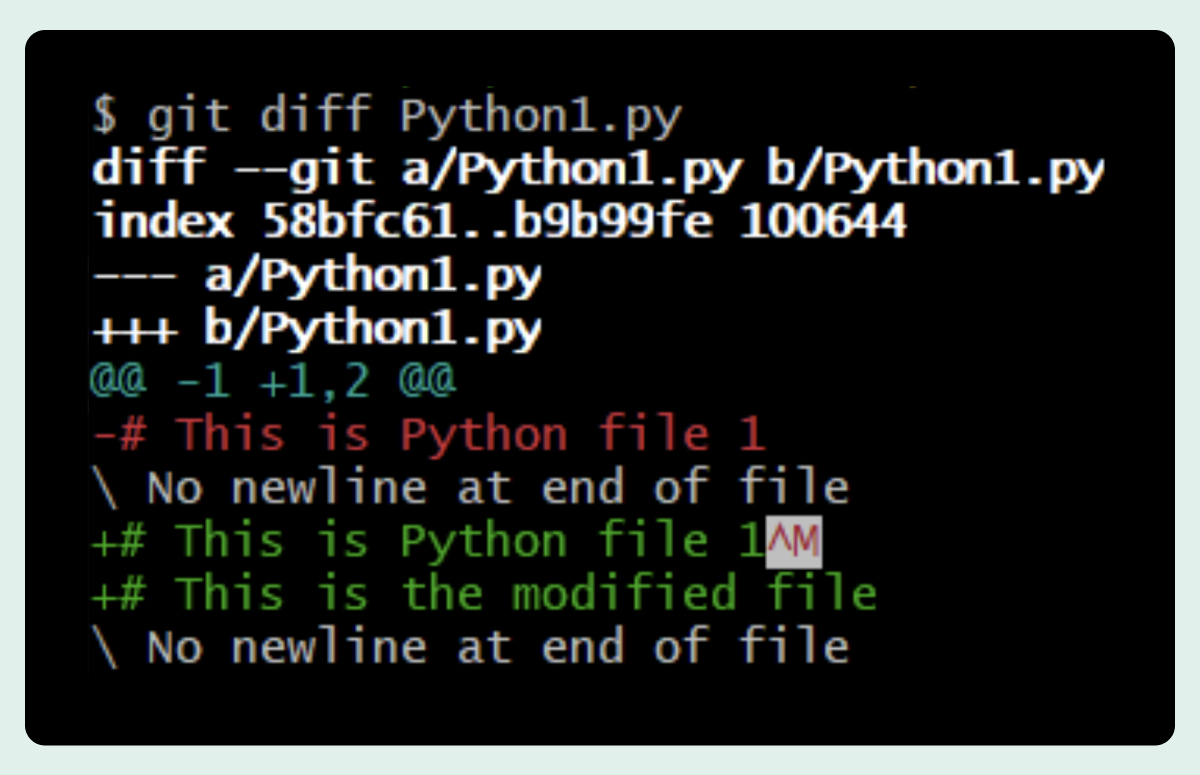
git diff <path>: The diff command shows the changes between a committed file and the file you're working on.
git clone: If you're working on a remote repository of code, you'd use the git clone command instead of git init to clone that repository locally. Cloning makes a working copy of the remote repository on your local computer, and that clone has its own history and manages its own code files.
git push: As described earlier, git push sends your committed files to the central remote repository.
git pull: You should always pull the latest code from the remote repo before pushing your local changes onto it to ensure no conflicts exist. When you run git pull, Git fetches the latest code from the remote repository and informs you if any conflicts exist.
What is GitHub?

GitHub is a cloud-based service based on Git. It provides a place to centrally host your code, making it essentially a git hosting service. Its simple user interface makes it easy to manage Git repositories visually. GitHub also includes collaboration tools that help remote developers collaborate on a project.
In essence, Git is a technology, while GitHub is a service built around that technology. While you need Git installed on your local machine to work with GitHub if you want to code locally, the workflow with GitHub is far more intuitive than using Git's CLI.
You could also skip coding on your machine altogether and simply code on GitHub's online code editor.
GitHub integrates into Visual Studio Code and IntelliJ IDEA, adding a seamless connection between your GitHub repository and your local repository.
Some of the other services GitHub offers are:
- GitHub Copilot: An AI-coding assistant.
- Branch protection rules: These rules help you maintain the integrity of your branches. For example, you can set a rule that no code is merged without first being approved.
- GitHub Actions: This is a continuous integration/continuous development (CI/CD) that allows you to automate your build/deploy pipeline from within GitHub.
- GitHub Pages: These are static web pages associated with your project that you can host at no additional cost on GitHub, so you don't need to pay for additional web hosting to host a simple website for your project.
- GitHub Desktop: GitHub's desktop software lets you interact with GitHub seamlessly, taking much of the pain out of working directly with Git commands.
To get started with GitHub, just open a GitHub account here.
Git vs. GitHub: Which should you choose?
The learning curve between Git and GitHub is quite different. If you want to get started rapidly, the Git vs. GitHub question is answered simply: choose GitHub.
Using GitHub, you'll naturally start becoming familiar with many of the Git commands without the additional complexity of the CLI.
GitHub is incredibly popular. There are over 100 million GitHub users and more than 400 million GitHub projects. If you intend on collaborating on code, it's a far better option than Git on its own. And if you're new to coding, GitHub Copilot can help you immensely in learning the basics.
No-code alternatives
No-code and low-code platforms, such as our Text Platform, allow you to start creating apps with zero programming knowledge and then monetize those apps.

No-code/low-code refers to an increasingly popular set of tools with which people of all skill levels can create apps using visual elements.
Similar to how GitHub provides an easier onramp to learning Git, no-code/low-code tools provide an easier onramp for anyone to learn programming. By starting with a platform such as Text Platform, you can start grasping some of the basic concepts of coding. Once you're more comfortable, you can dive into some of our projects on GitHub and start reading the code.
Yes, we also use GitHub, and we love it. Feel free to look around at all the source code there.
With so many options, nothing is stopping you from building an app today. Open your account here to sign up and start creating apps.
