Building HelpDesk apps
Introduction
Developer Console allows you not only to create LiveChat Apps, but also to develop integrations for HelpDesk and publish them on the HelpDesk Marketplace.
Connect your HelpDesk to an external tool or service, extend HelpDesk user interface, or automate various tasks. Configure different functionalities, or create your own custom actions for agents in HelpDesk.
Use cases
HelpDesk provides developers with multiple tools which allow your app to do many different things, for example:
- Integrate with other products and services
- Extend HelpDesk user interfaces
- Create your own custom actions for agents in HelpDesk
- Automate tasks with webhooks
- Let users sign in to your service via Accounts SDK
App locations in HelpDesk
Your app can extend several areas of the HelpDesk App interface:
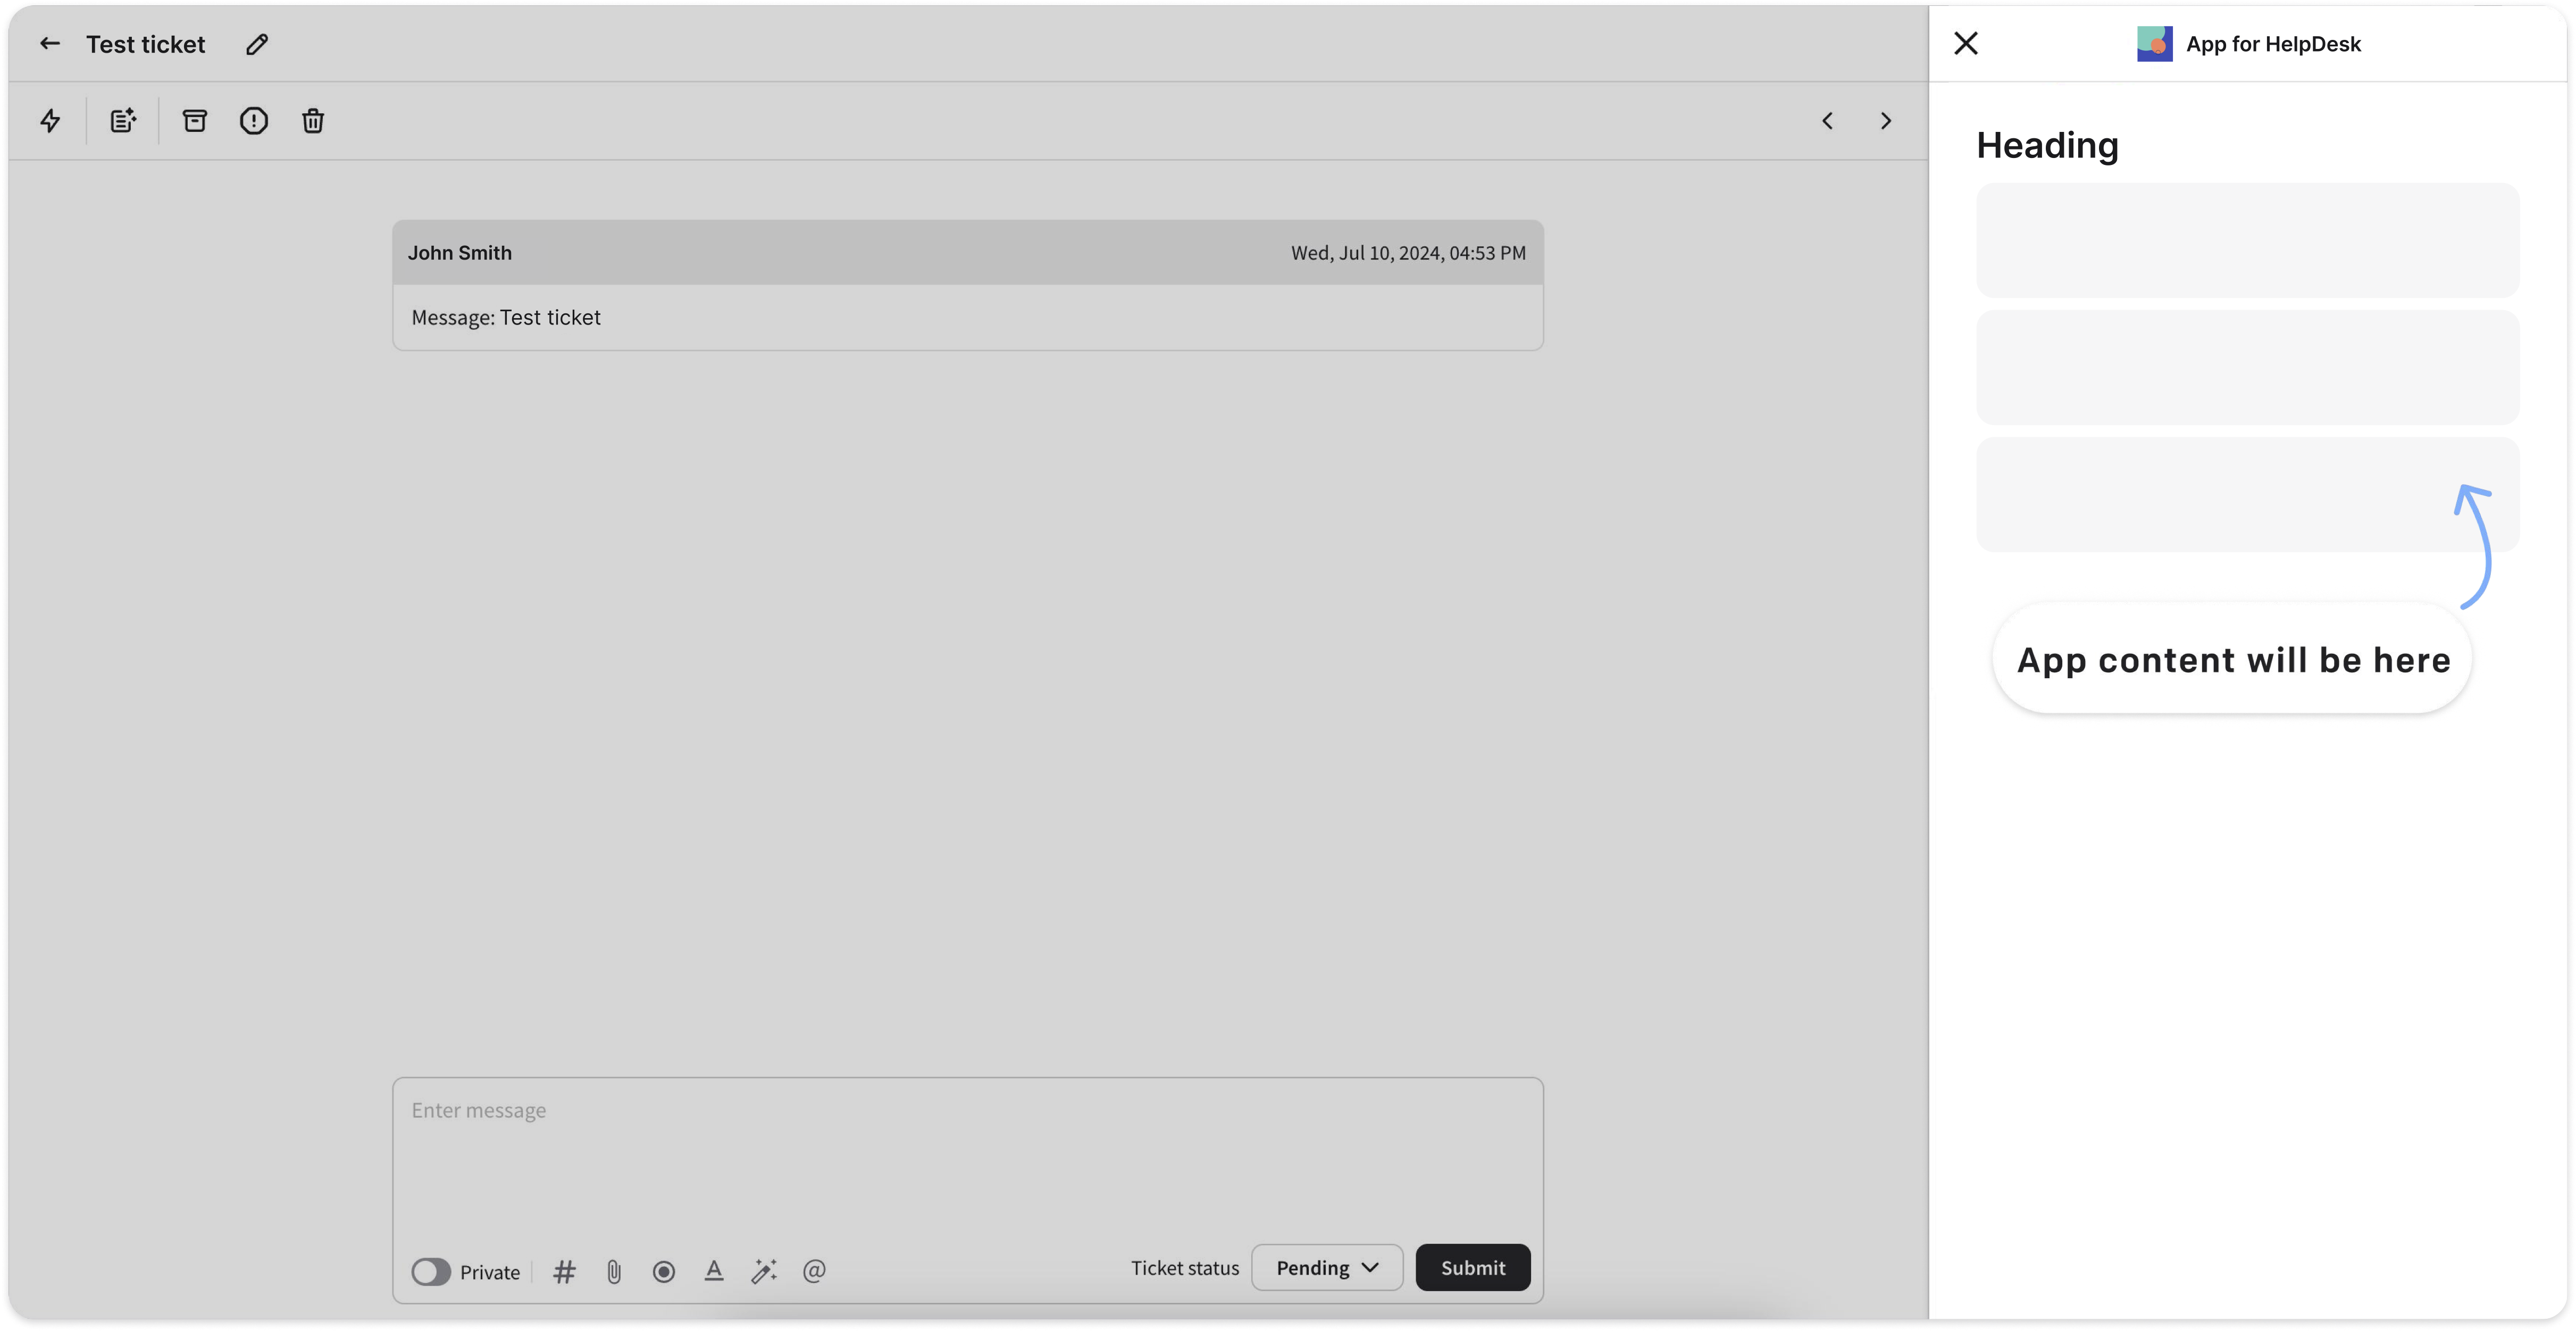
- Ticket Details, by adding a new tab with your web content or a new widget in the default Ticket Details tab
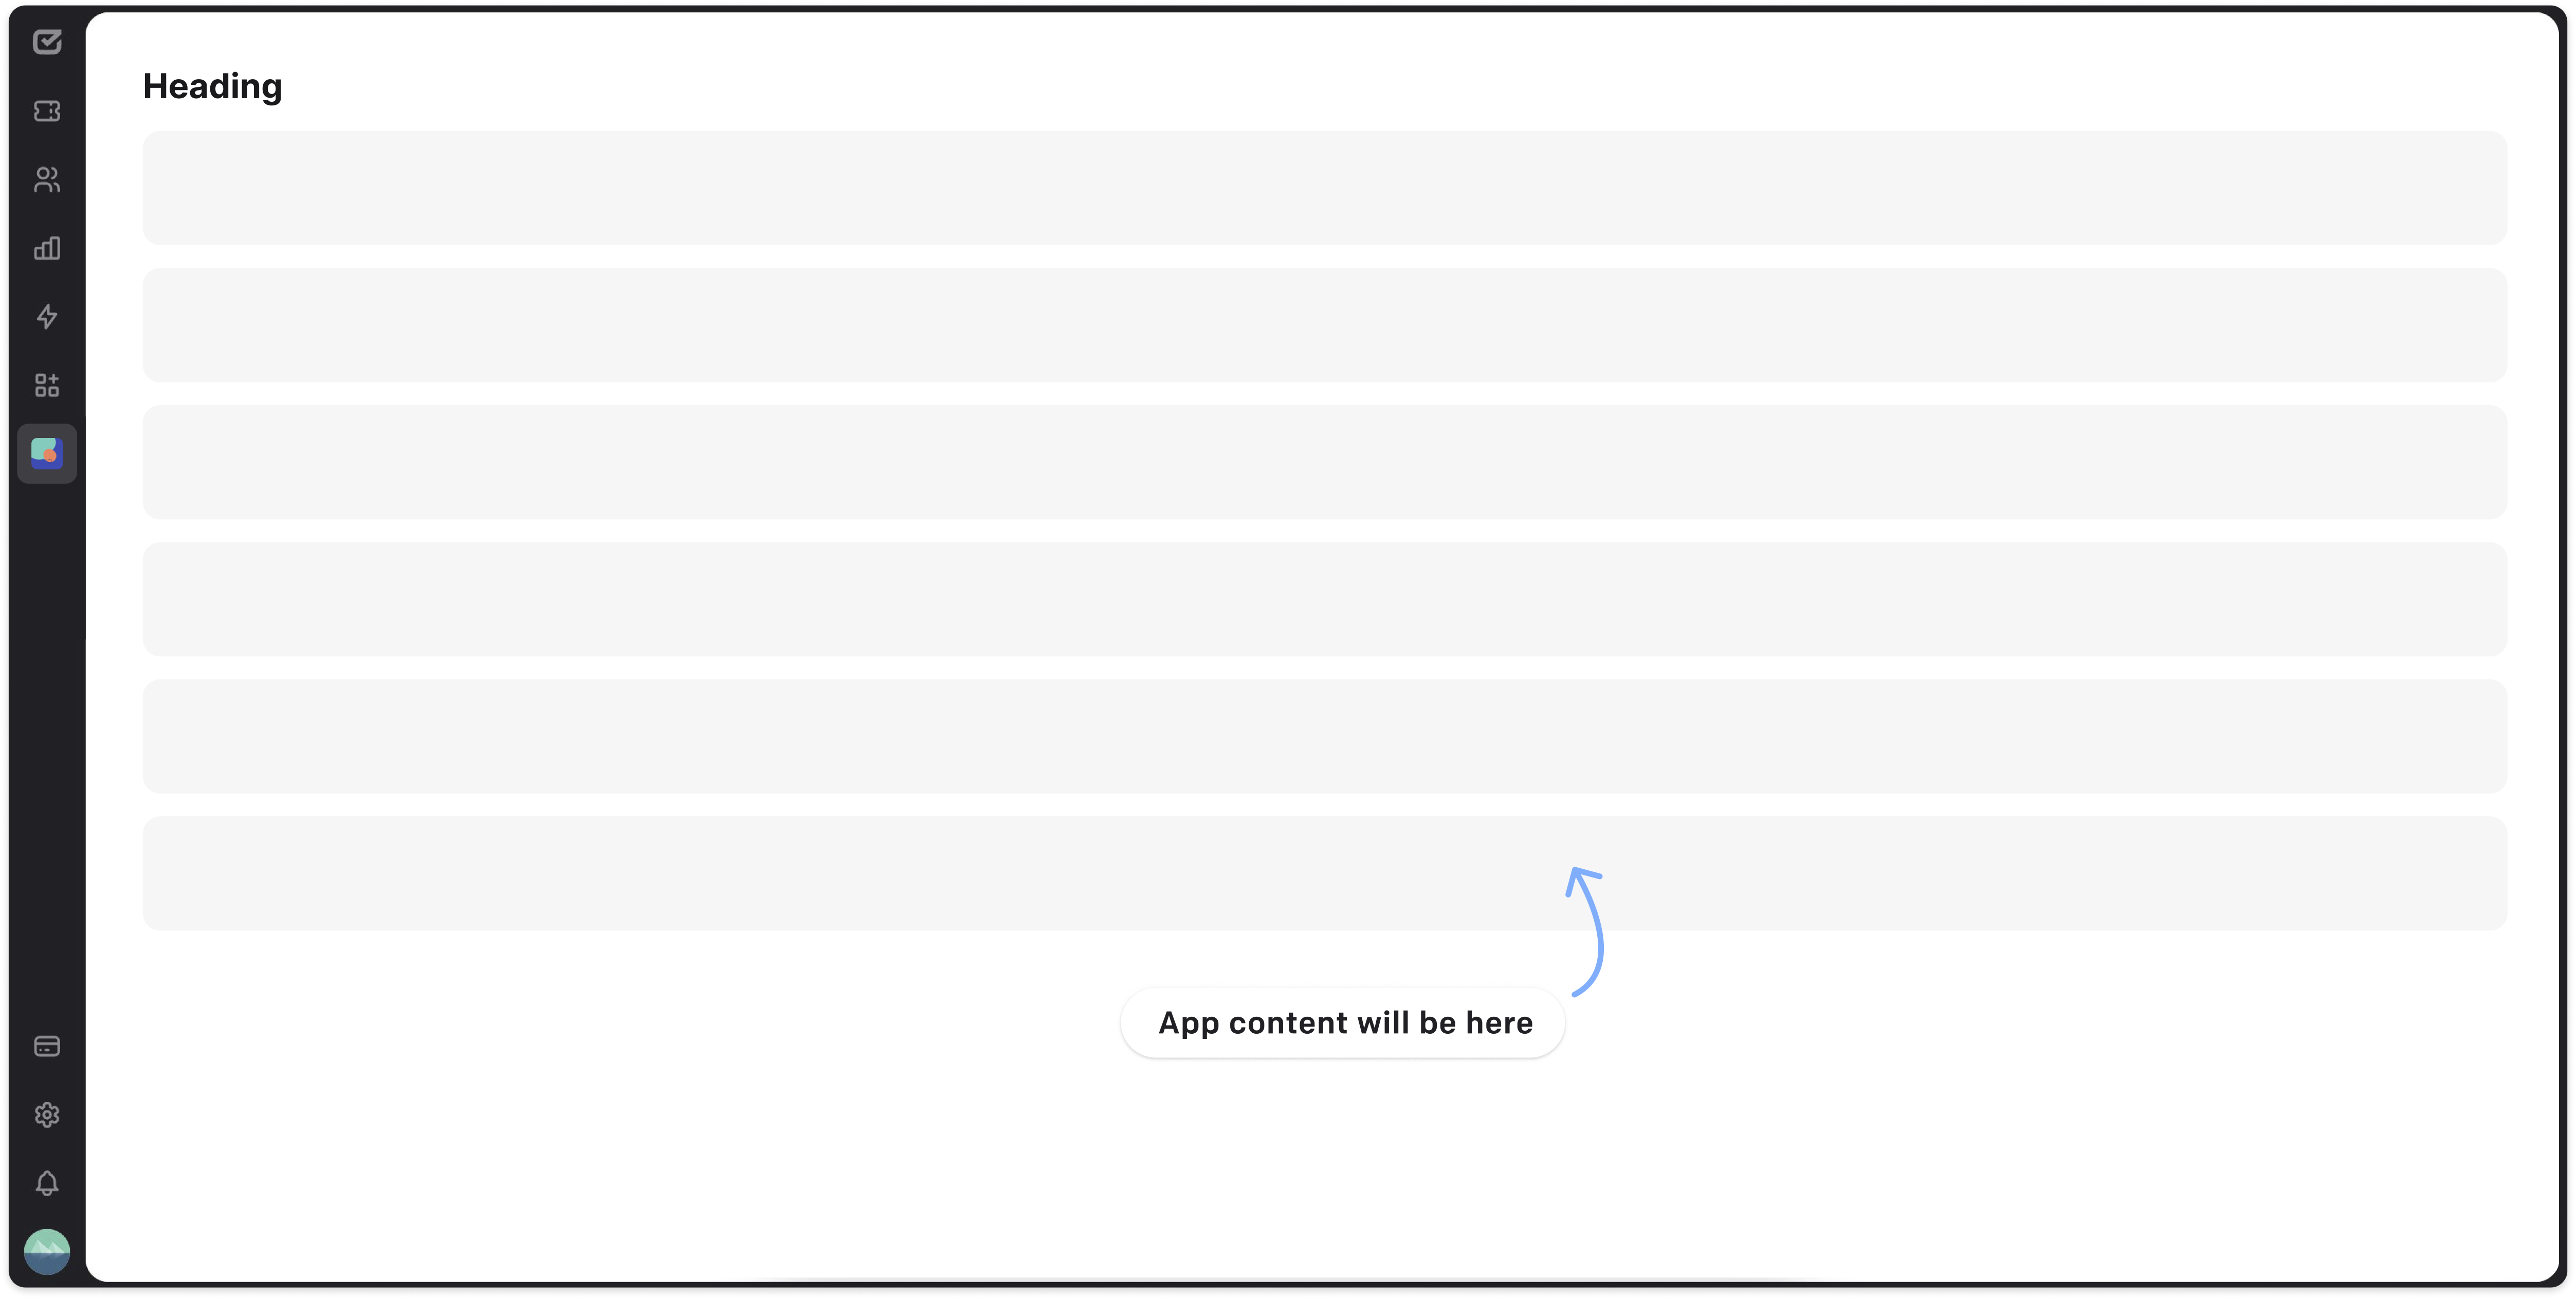
- Fullscreen, by adding a new, fullscreen section with your web content
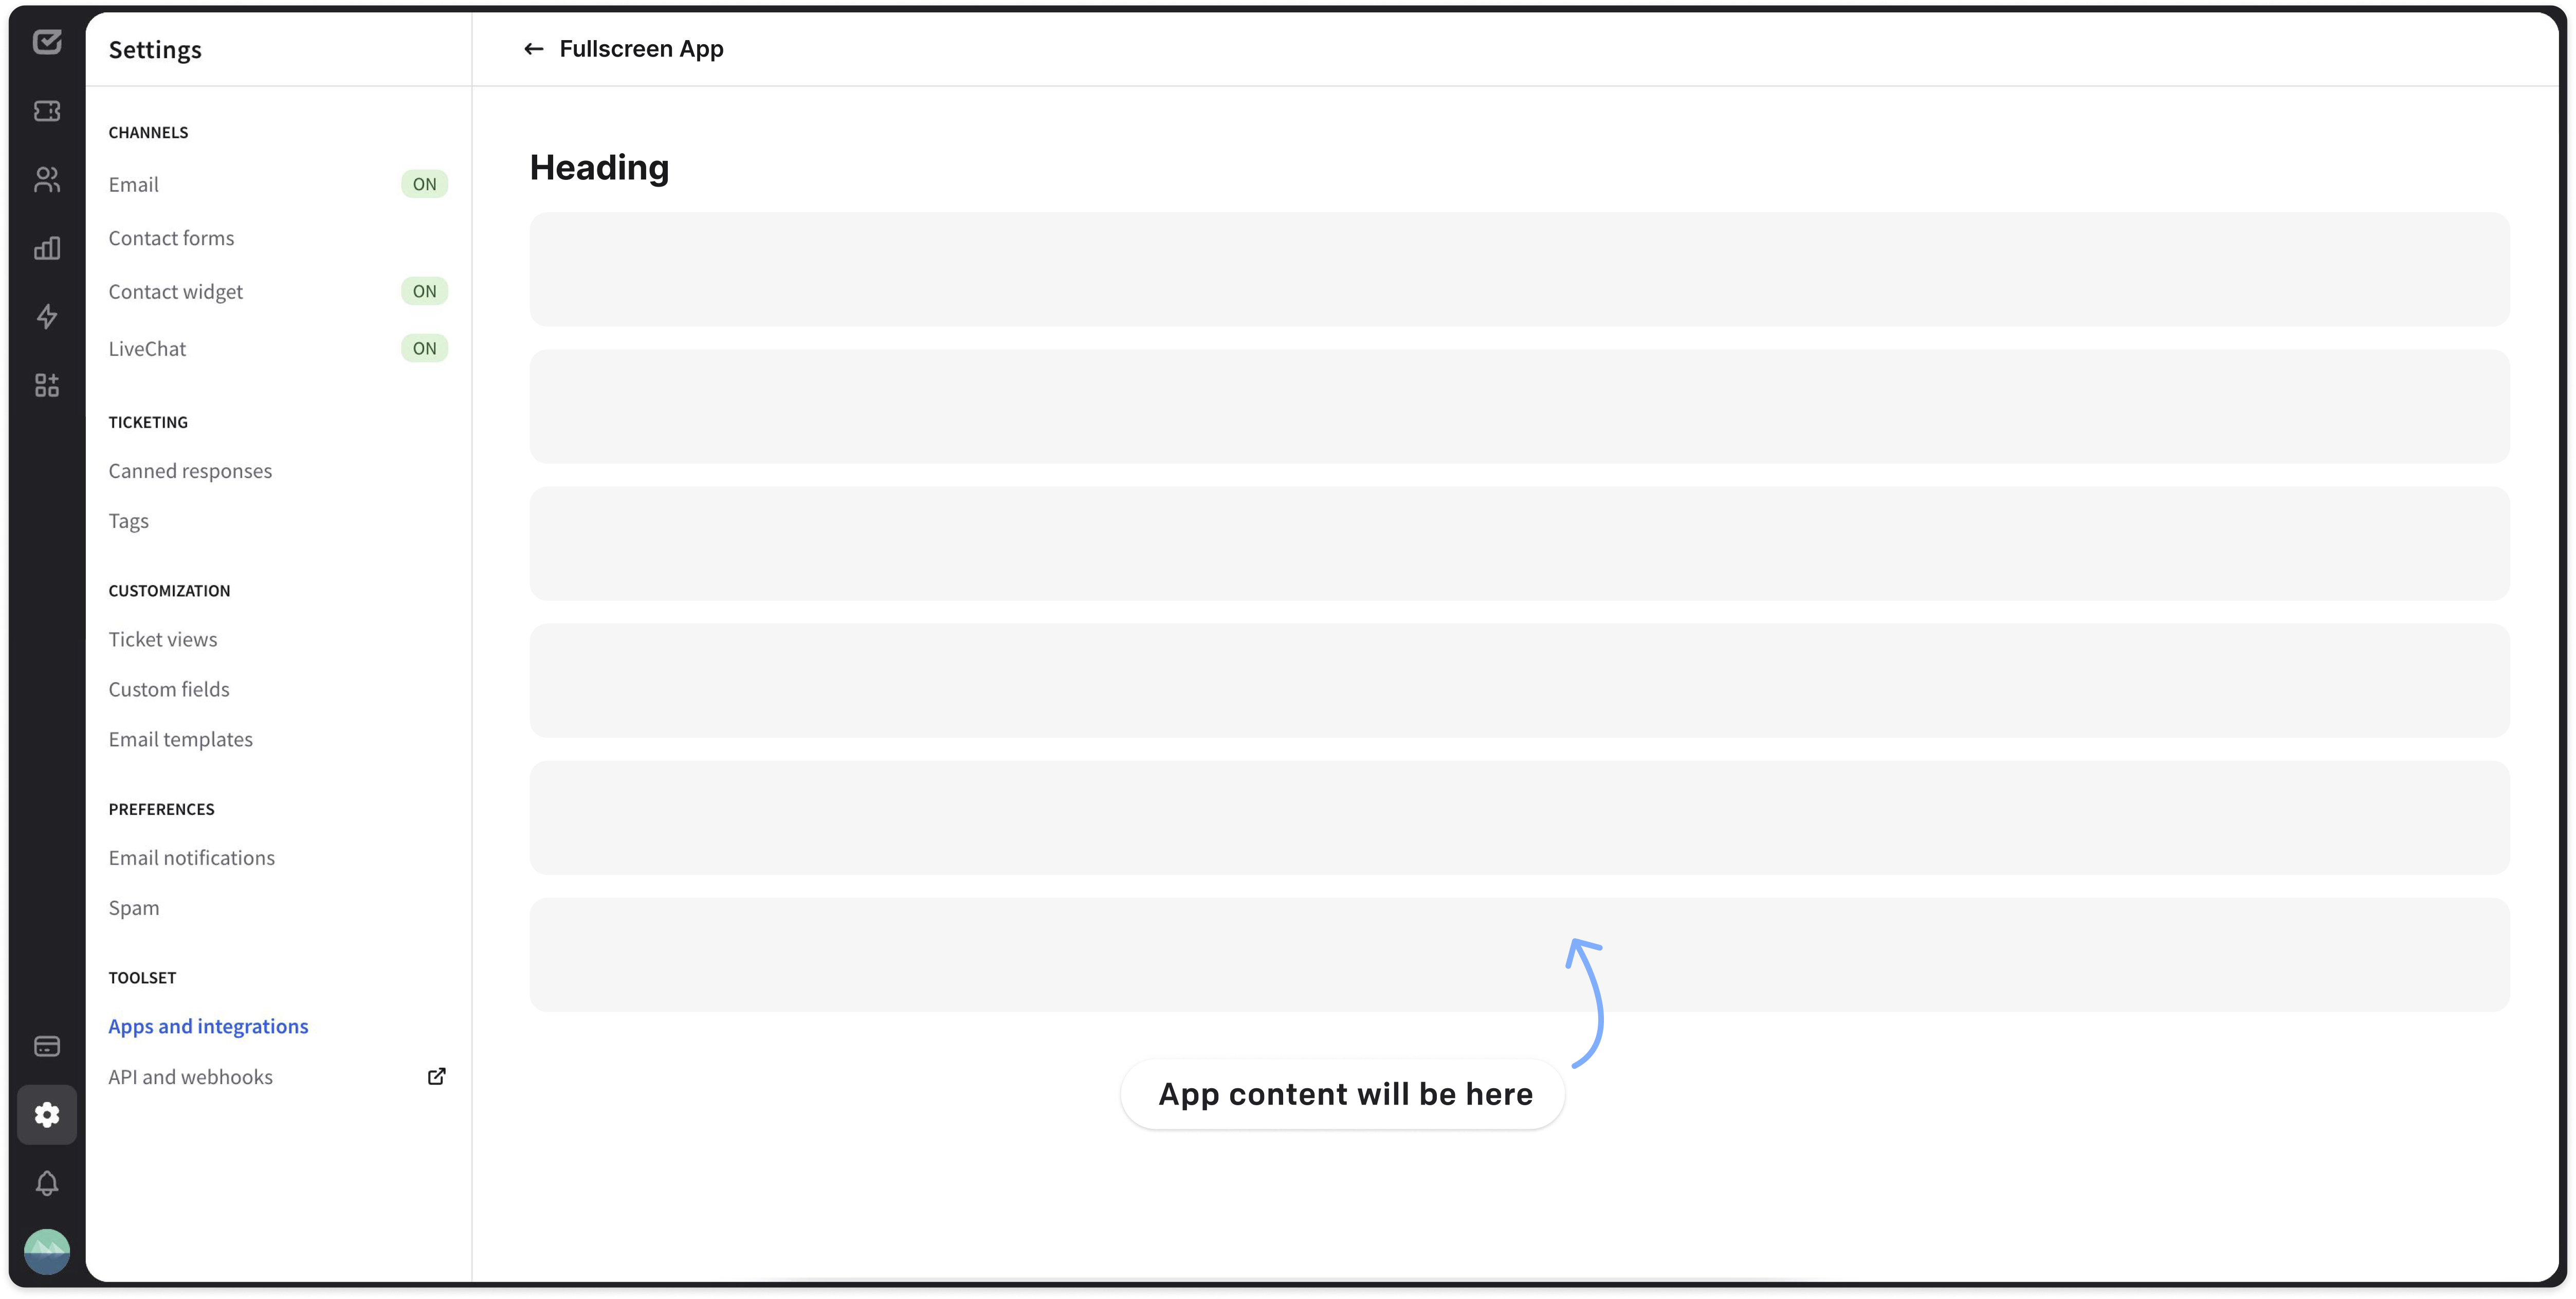
- App Settings, by adding a page with configuration settings for your app
Ticket Details
Apps in the Ticket Details tabs are the most common way to extend the HelpDesk UI. They are displayed in the right sidebar of the HelpDesk App when browsing Tickets.
Fullscreen App
The main menu is a place where you can add a new, fullscreen section with your web content. Fullscreen apps are located in the navigation bar on the left, and they open maximized in the HelpDesk App.
App Settings
The App Settings is a place where you can add a page with configuration settings for your app. Usually, developers use this placement to handle cases such as:
- asking users to enter an API key or other credentials for the 3rd party service.
- giving admins an option to extend or restrict app permissions for agents.
- displaying an interface where users can customize app settings per group.
- triggering app authorization, especially if the app doesn't have a Ticket Details widget.
Creating HelpDesk apps
Step-by-step guide
If you want to create a simple HelpDesk app in the Developer Console, follow the instructions we’ve prepared. We'll use an app named Your Buddy as our example.
Step 1 Getting started
To start, you need to check if you are signed in to the Developer Console. You can sign up here. However, your LiveChat or HelpDesk credentials should log you in automatically.
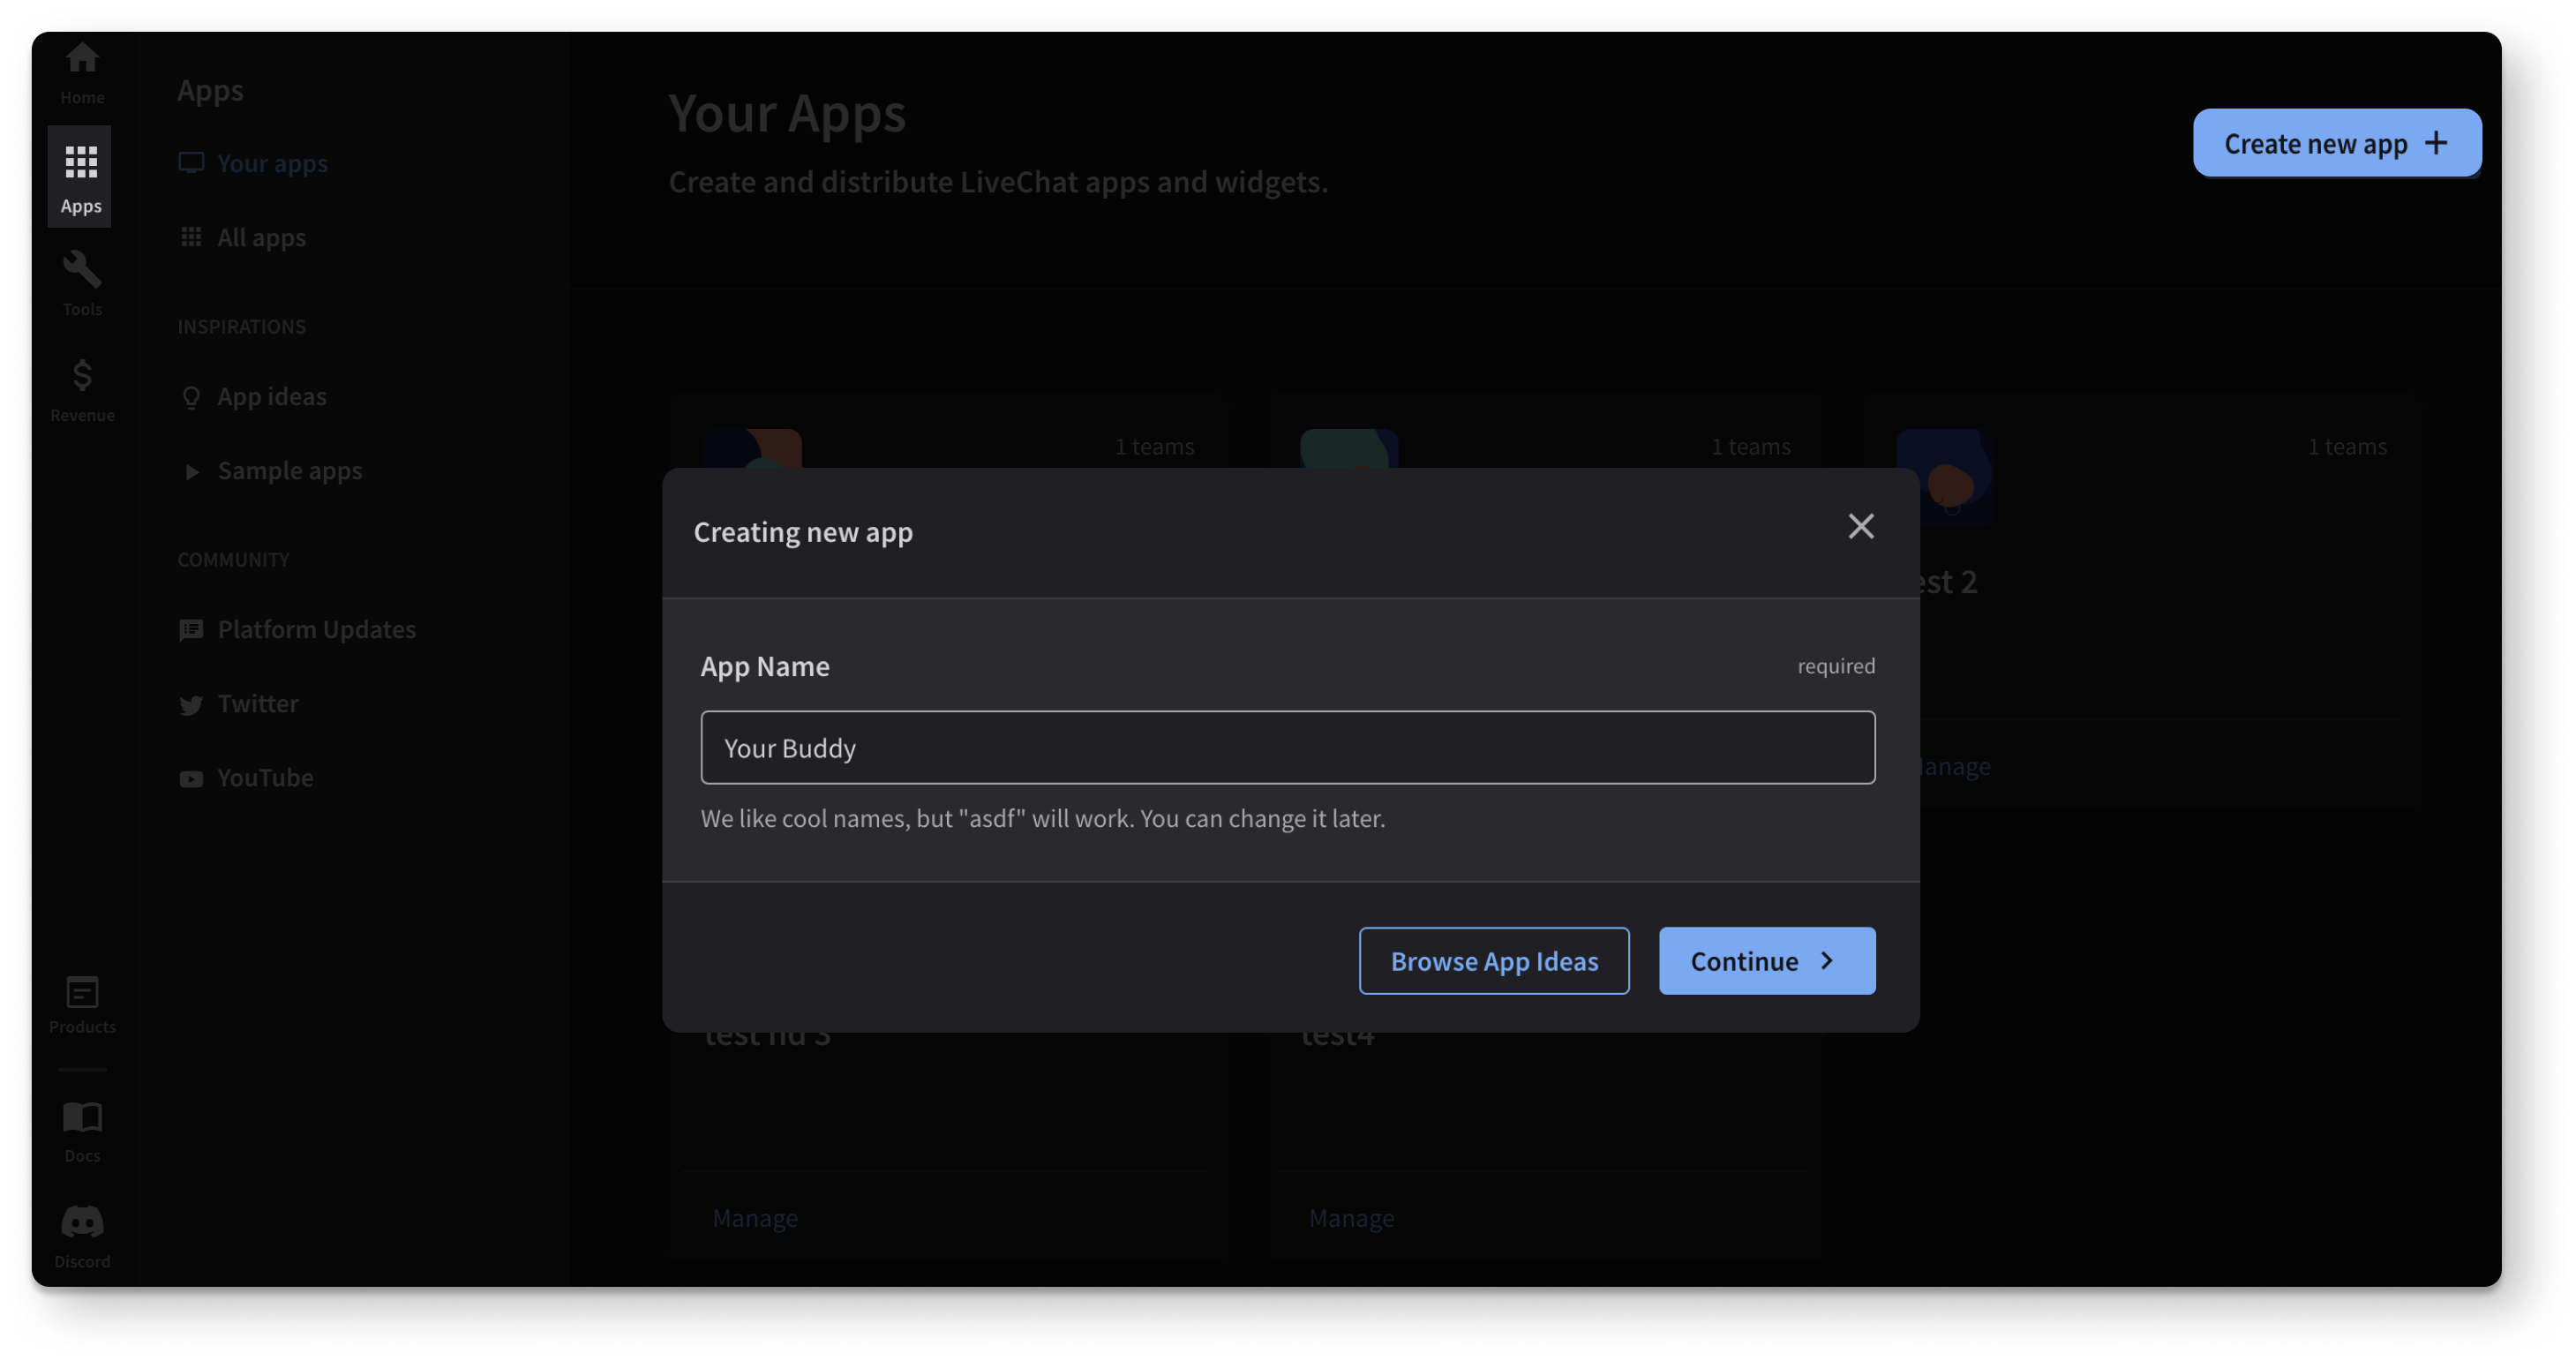
The first step in the Developer Console is to go to the Apps tab and click the Create new app + button. Give your app a name and click the Continue button. The application's name can be changed later.
Next, you need to decide which product you want to build your app for. In this tutorial guide, we will cover HelpDesk. Want to build for LiveChat instead? See the tutorial.
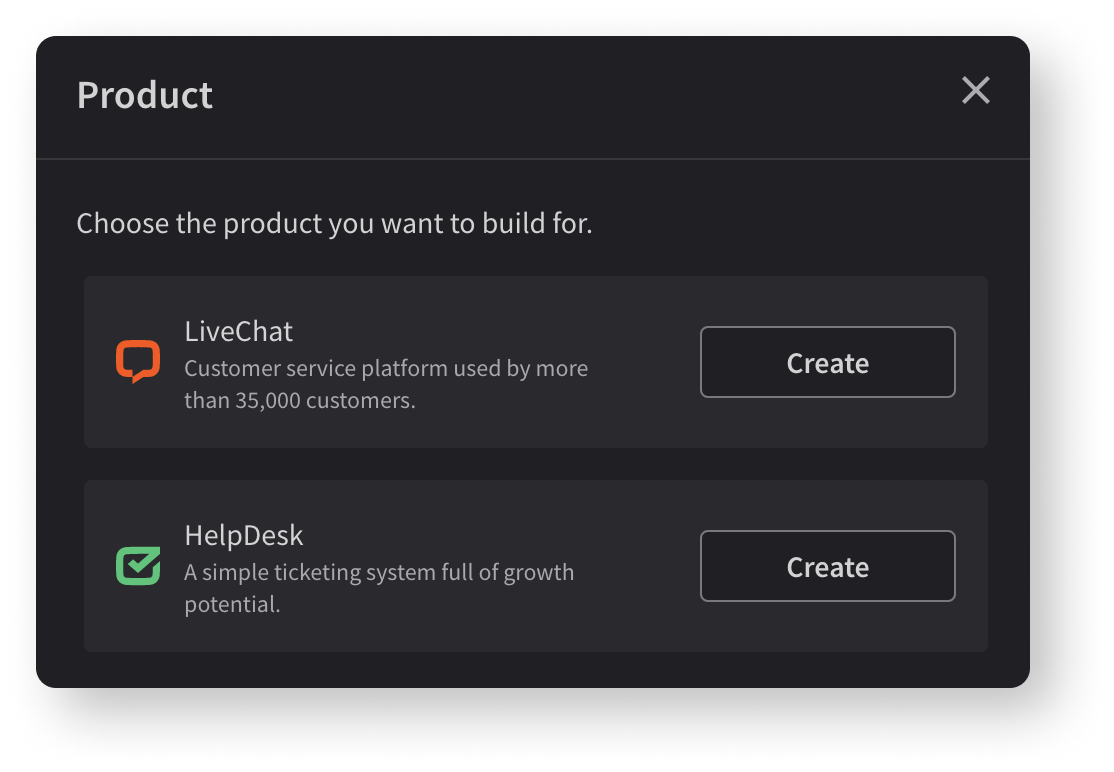
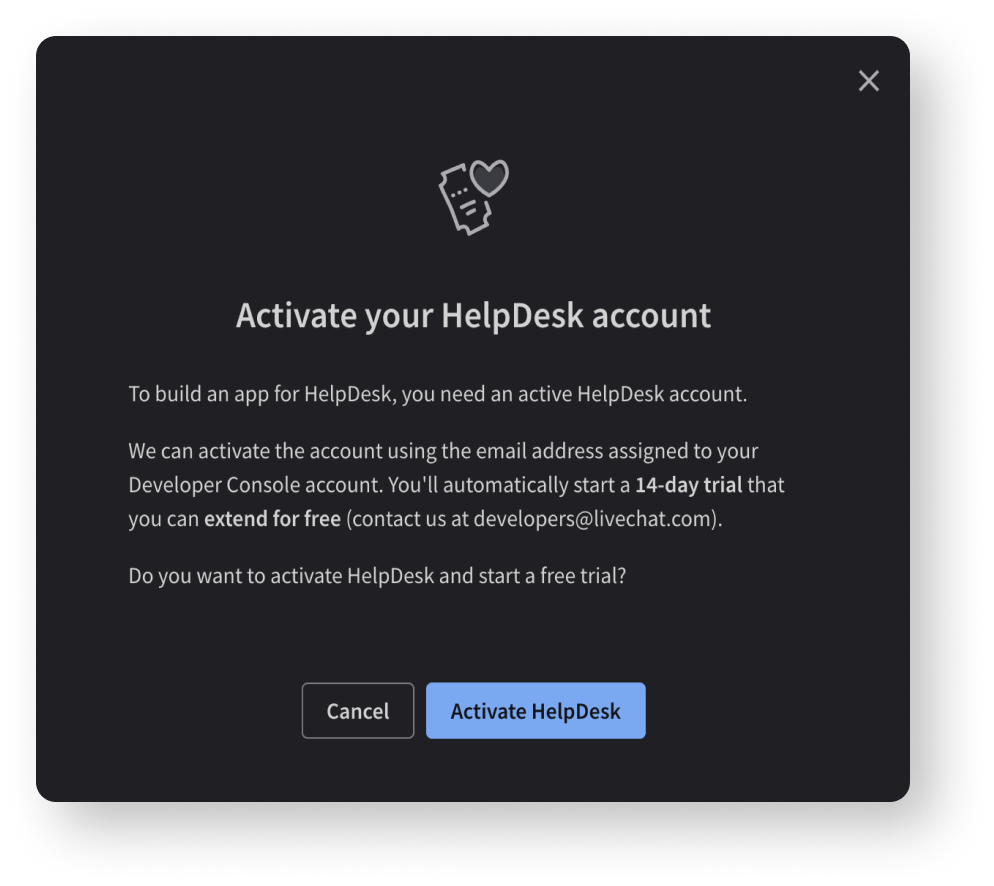
If you do not have a HelpDesk account, you will be asked to activate it. If you want to activate HelpDesk and start a free trial, click Activate HelpDesk button.
Step 2 Adding HelpDesk Widgets block
You can form your app using components called building blocks, which serve different purposes. To learn more about building blocks, go to Console guides.
In this guide, we will use the HelpDesk Widgets Building Block. Widgets are web apps that can interact and communicate with the HelpDesk App. They are loaded inside the HelpDesk App interface.
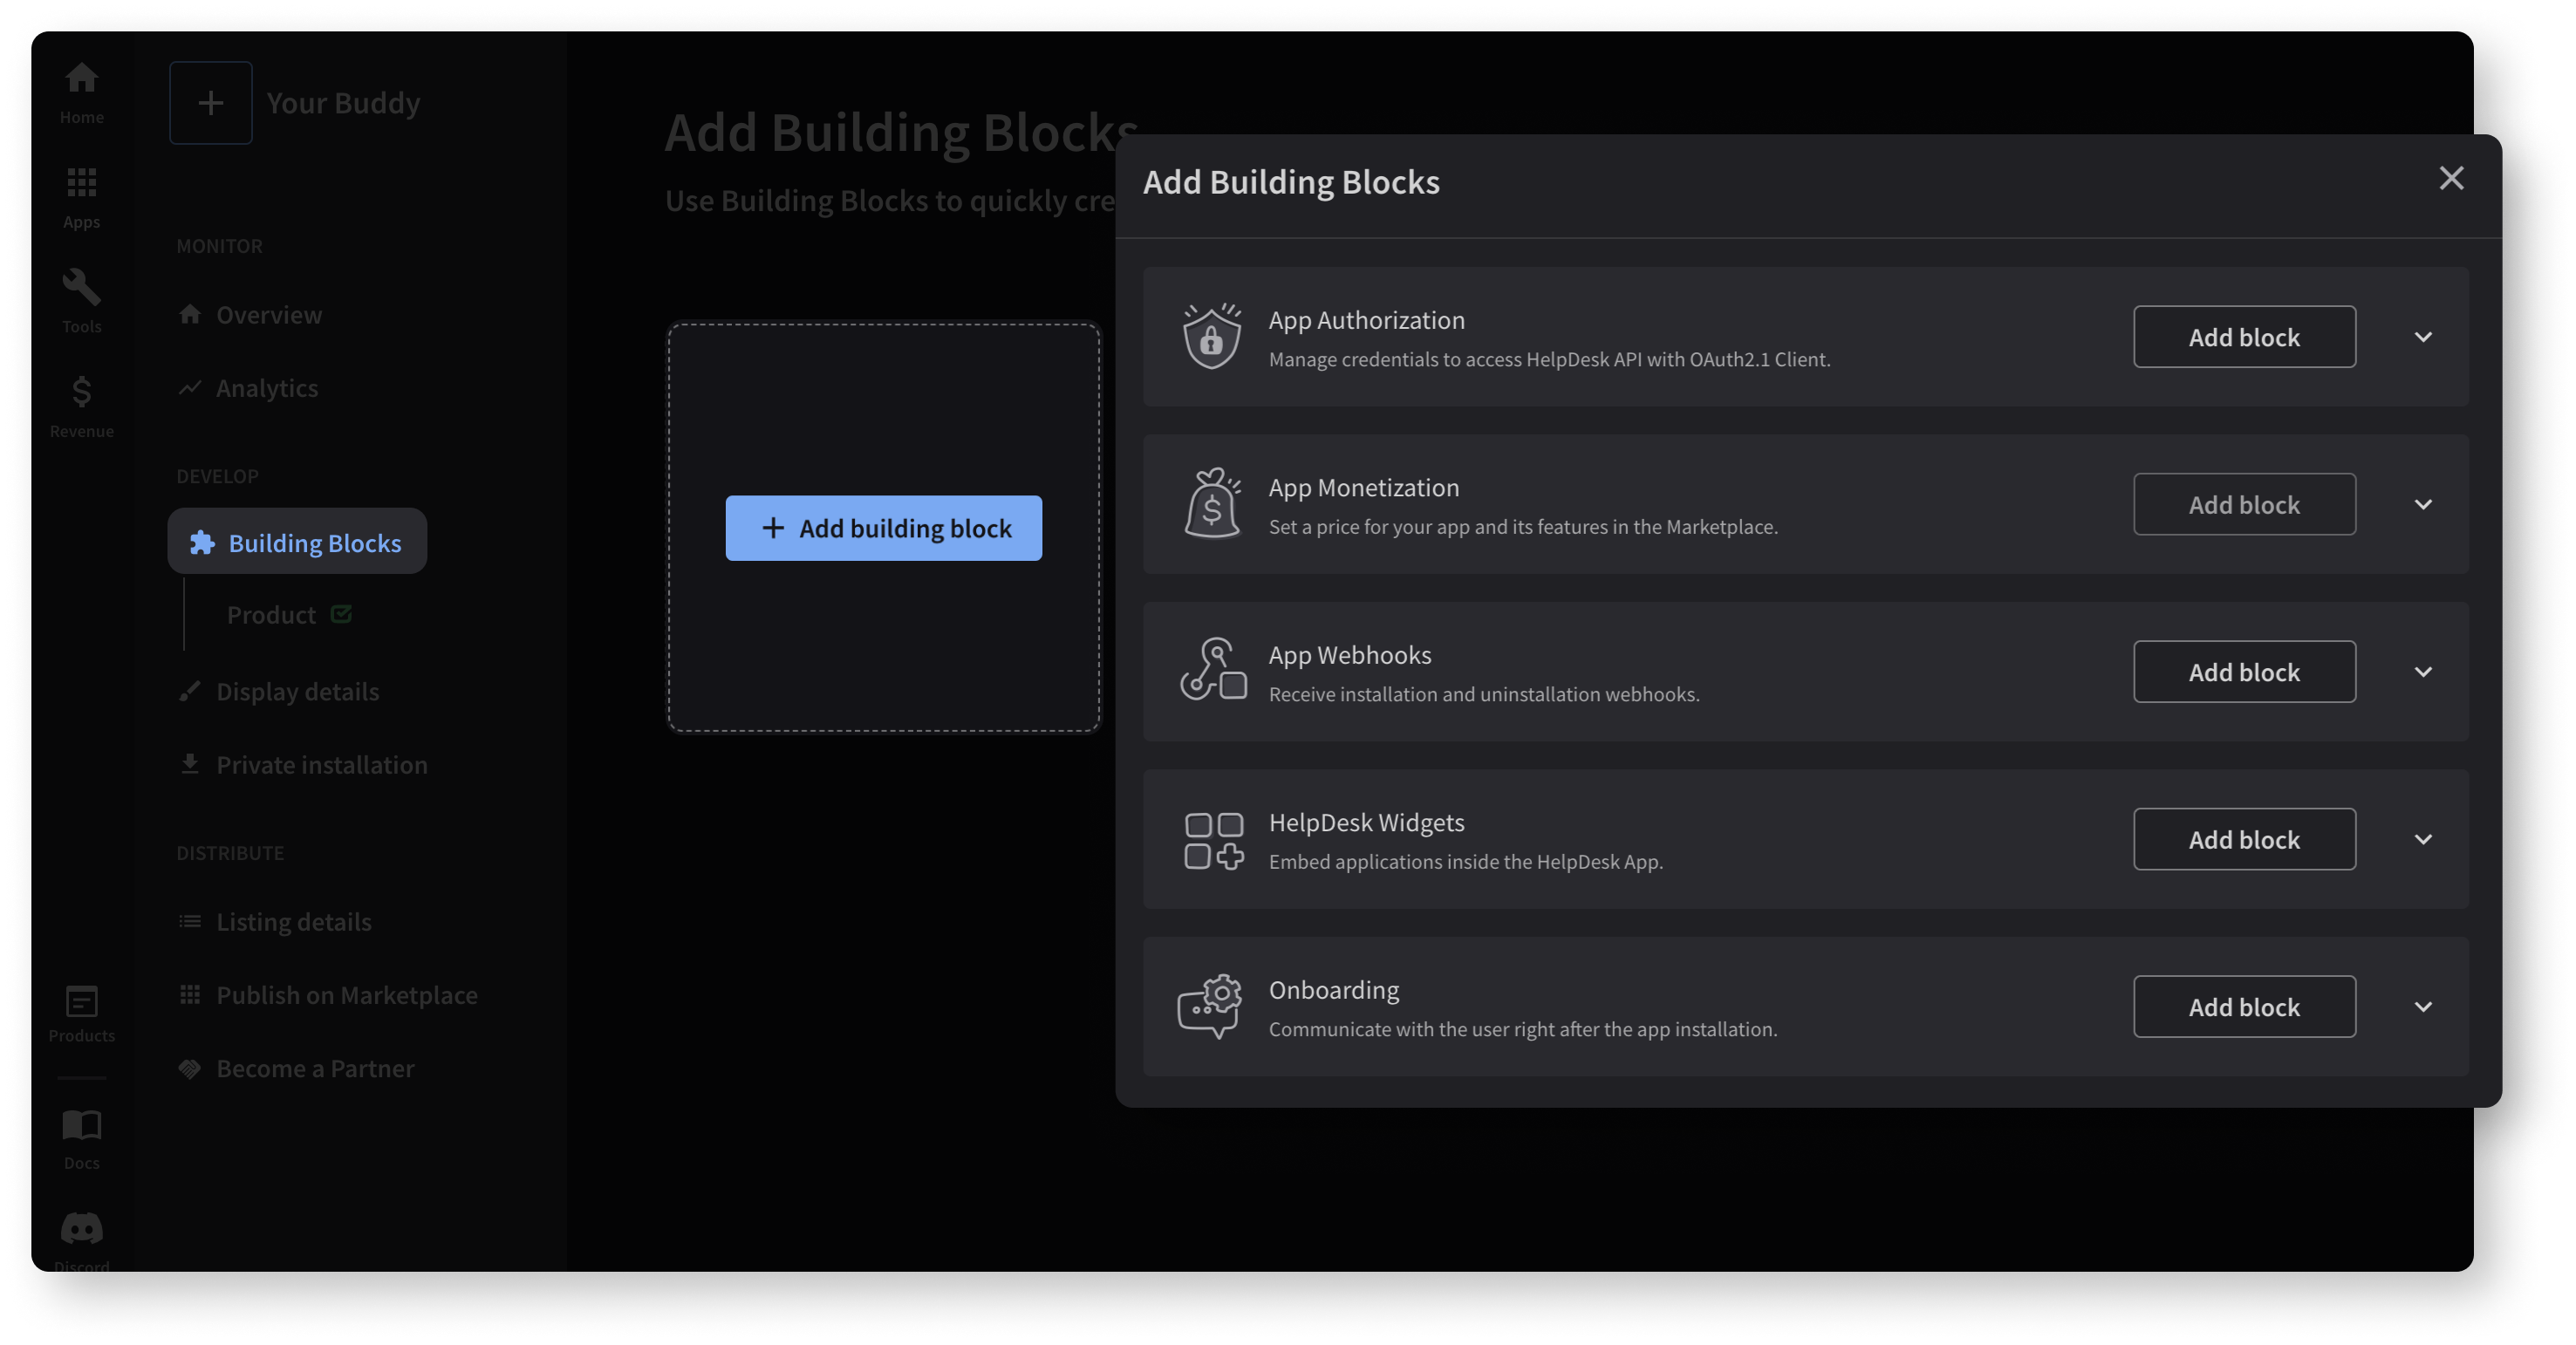
To add a new Widget to your application, you need to follow these steps:
- Go to the Building Blocks tab.
- Add a new HelpDesk Widgets block by clicking the +Add building block button and then choosing HelpDesk Widgets.
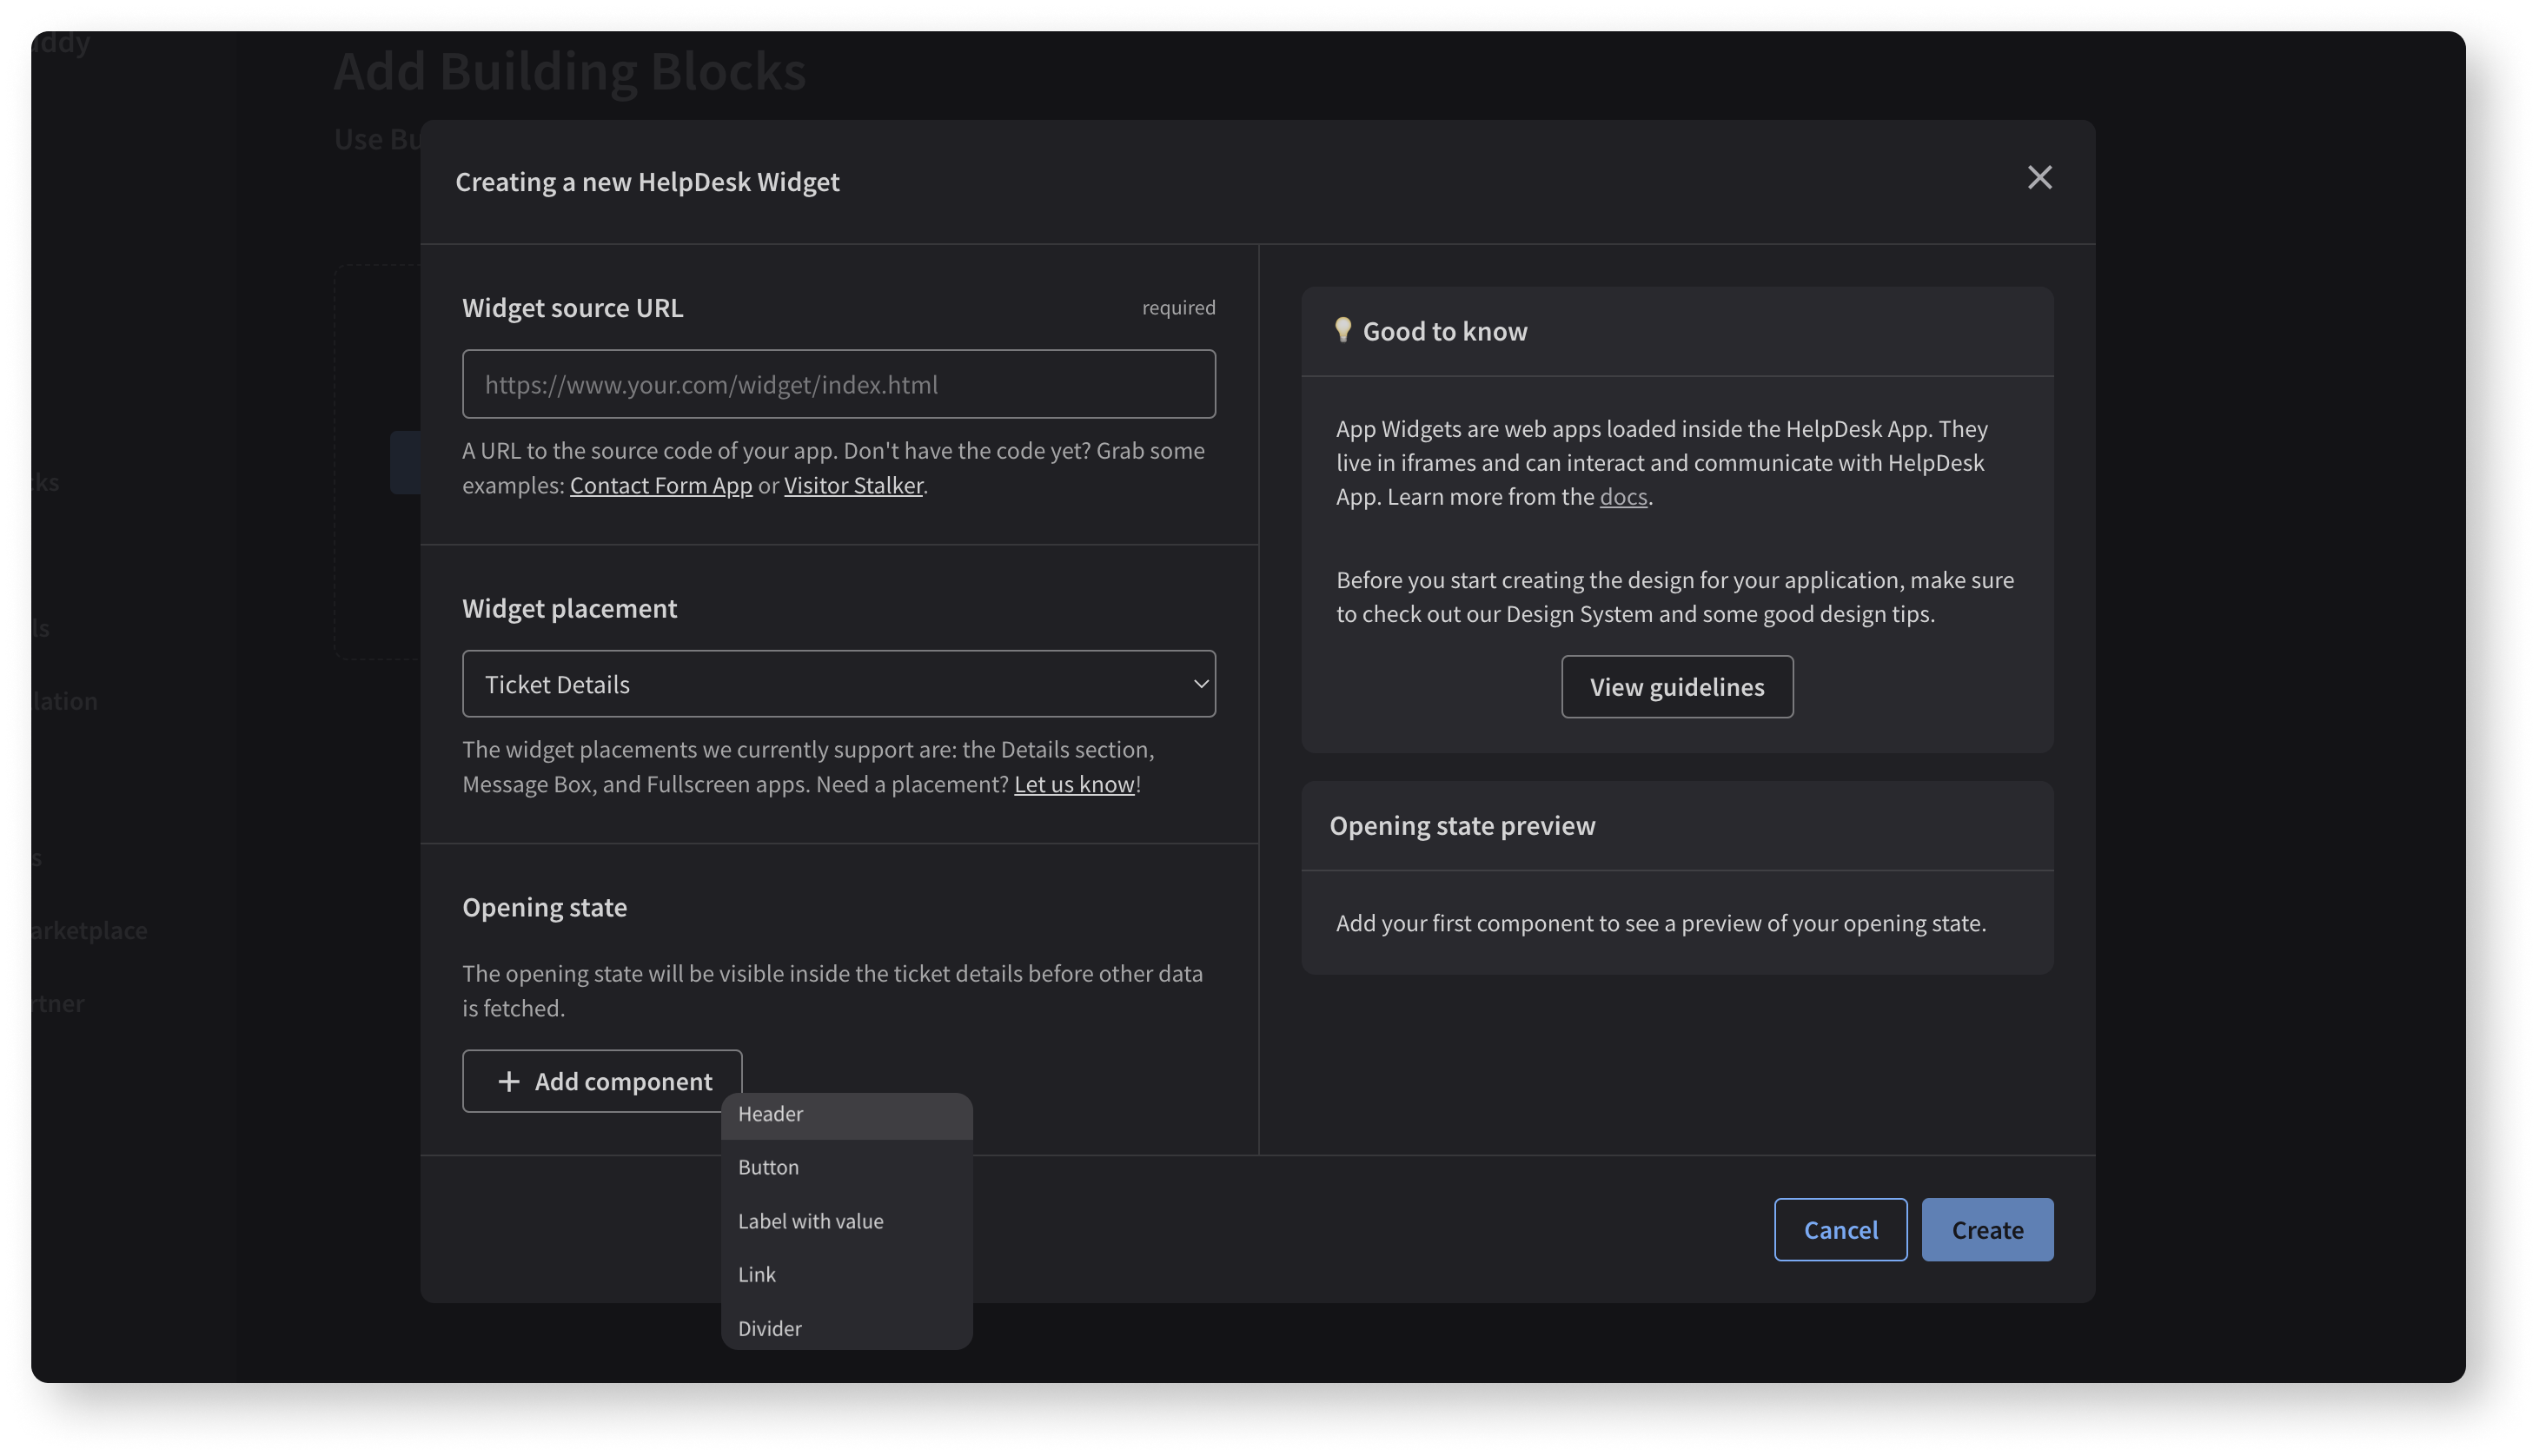
- Enter the Widget source URL, which is the address of your application. If it's not ready yet, you can use our sample apps to play around.
- Now, go to the Widget placement and choose one of the options. It allows you to decide where exactly in the HelDesk App you want to display your integration. We've chosen the Fullscreen App option in our example. In the HelpDesk App, full screen apps are located in the navigation bar on the left, and they open maximized in the HelpDesk App. Learn more...
- The Opening state section isn't required and works only for the Ticket Details widget placement. It allows you to add components to your application and see a live preview of what the app will look like in the Opening state preview. Learn more....
- Click the Create button and enjoy your app's first building block.
Step 3 Configuring Display details
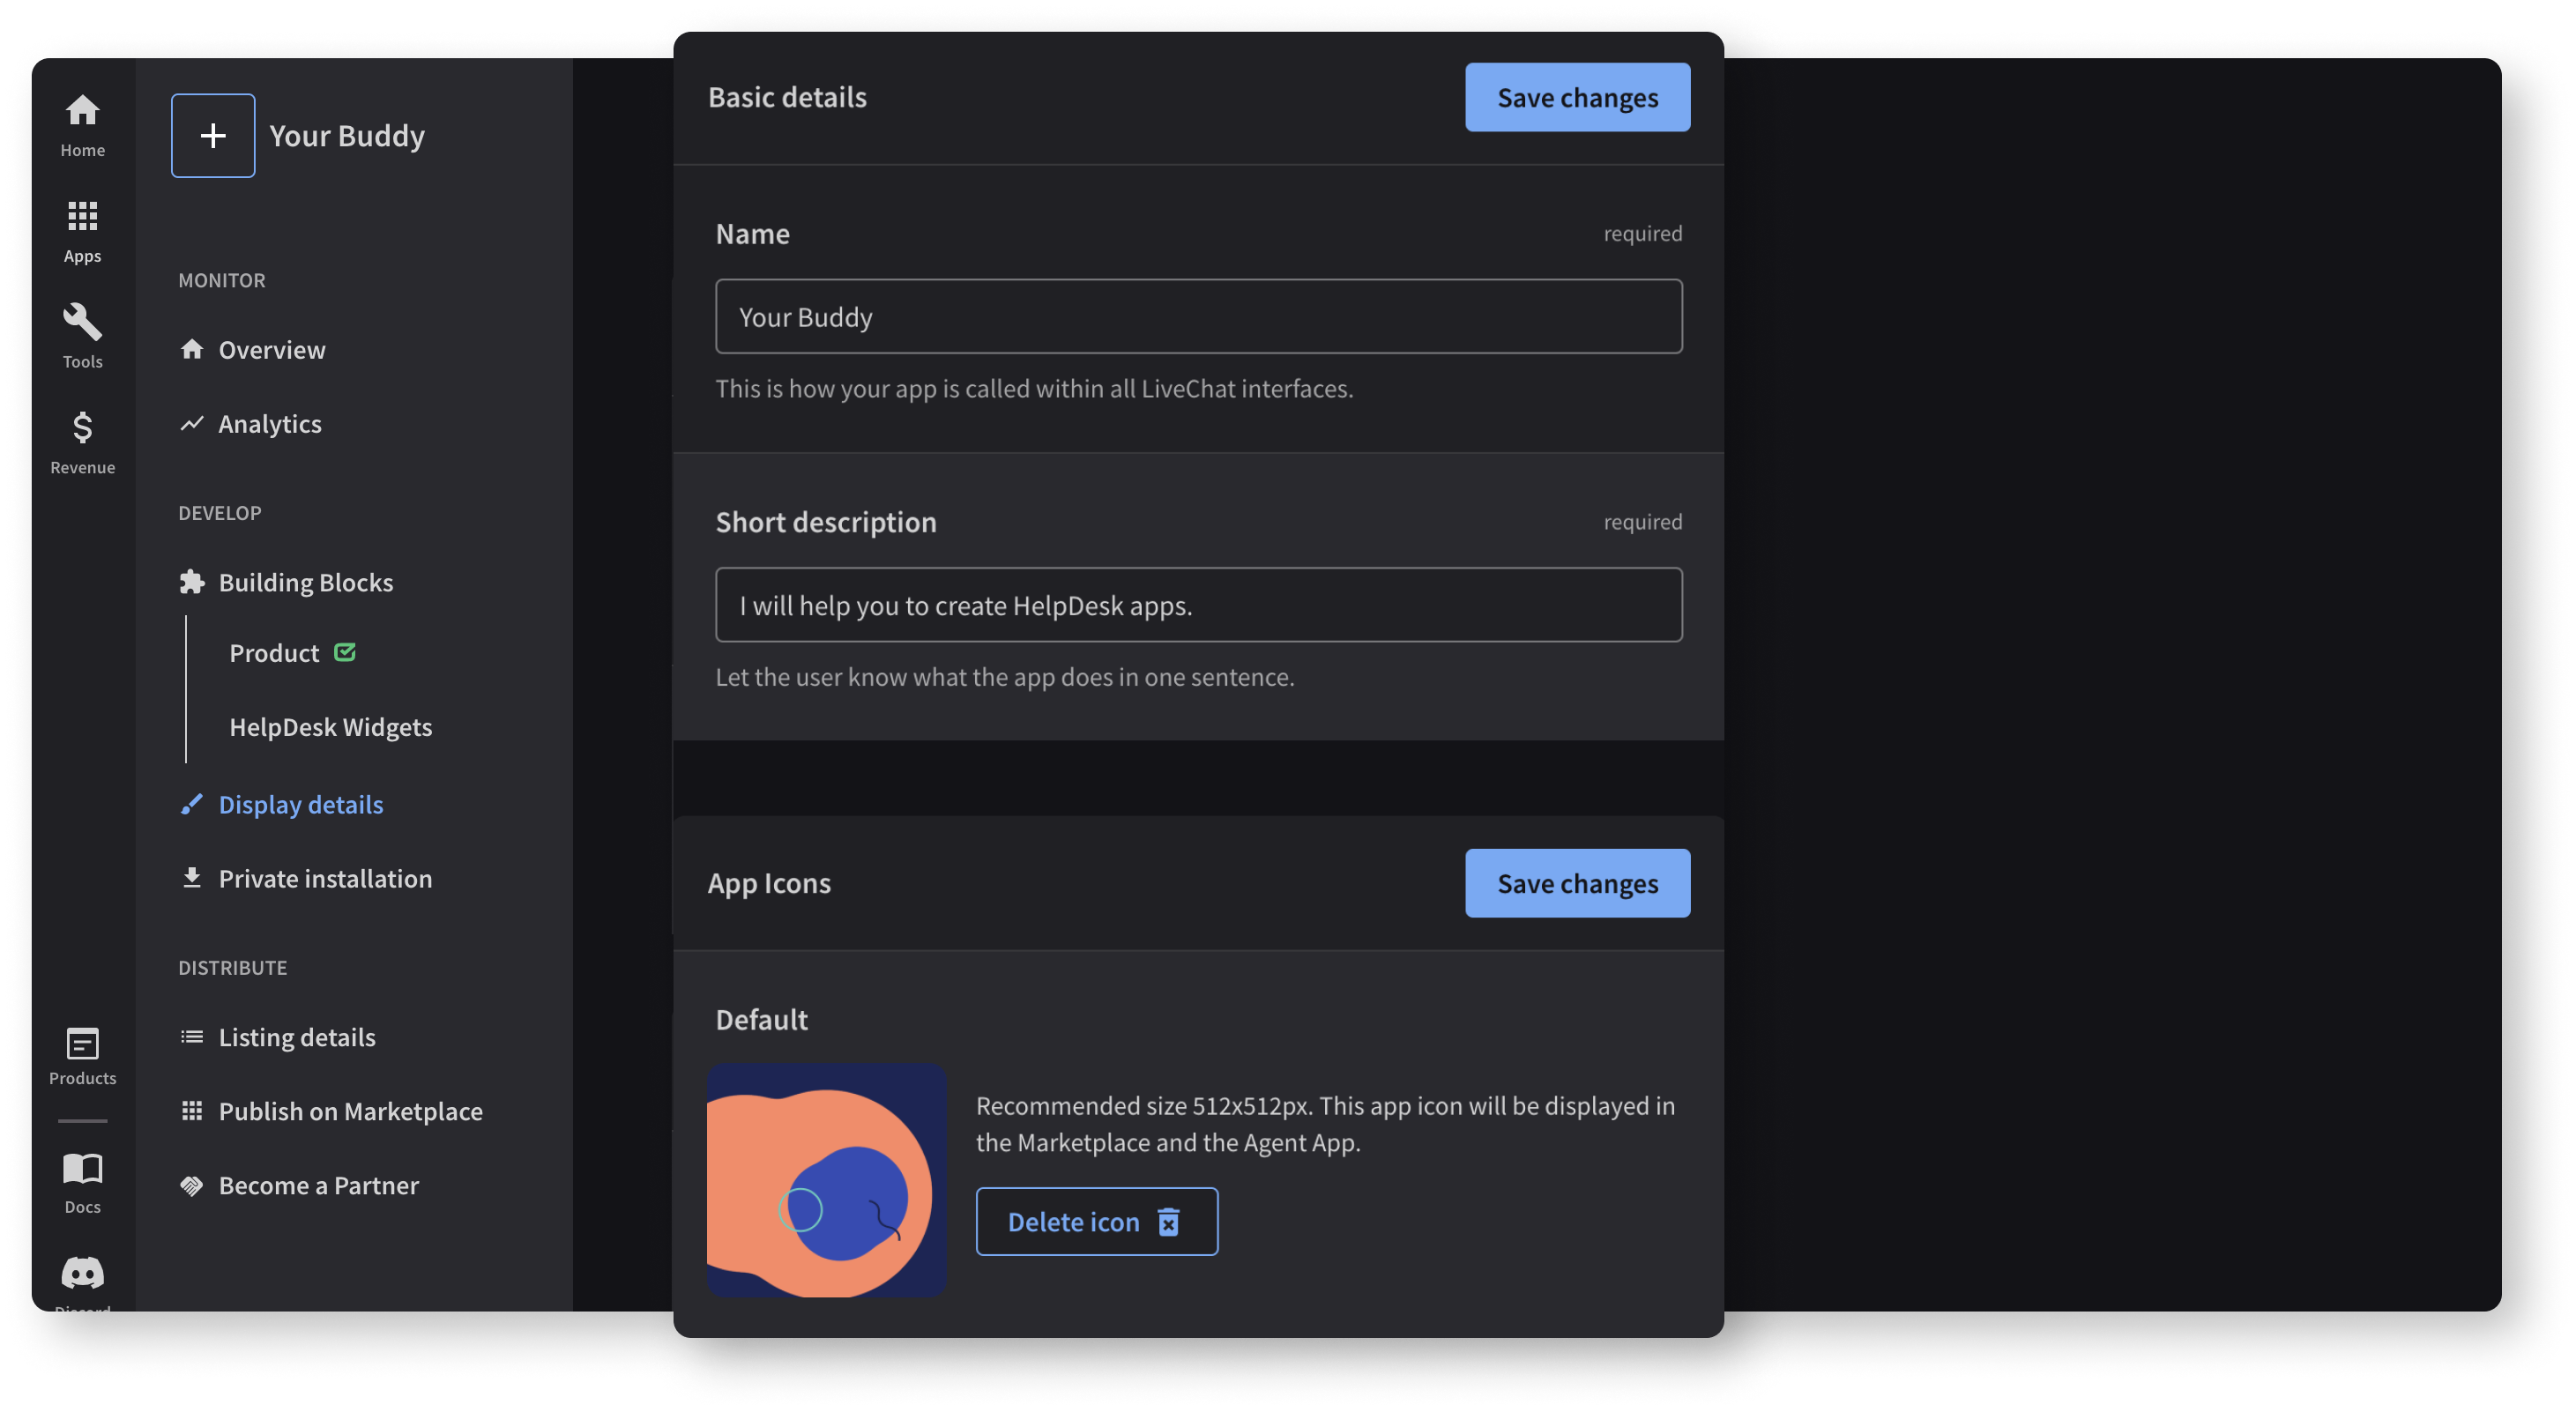
Now, it is time for the Display details tab that allows you to configure your app's short description and add an icon for better visibility in the HelpDesk App.
Follow the steps below to add a description and icon:
- Go to the Display details tab.
- In the Short description section, add a one-sentence description of your app to make your users aware of what your app does. You can change the description later.
- Add an icon for your app. It'll be displayed on the Marketplace and in the HelpDesk App. You can drag and drop your image, browse your file manager for it, or generate a random icon.
Step 4 Configuring Listing details
The next step is adding a few details of your app’s functionalities to make it easier to understand for your users.
To do that, go to the Listing details tab and fill in all the details.
💡 How to fill in app details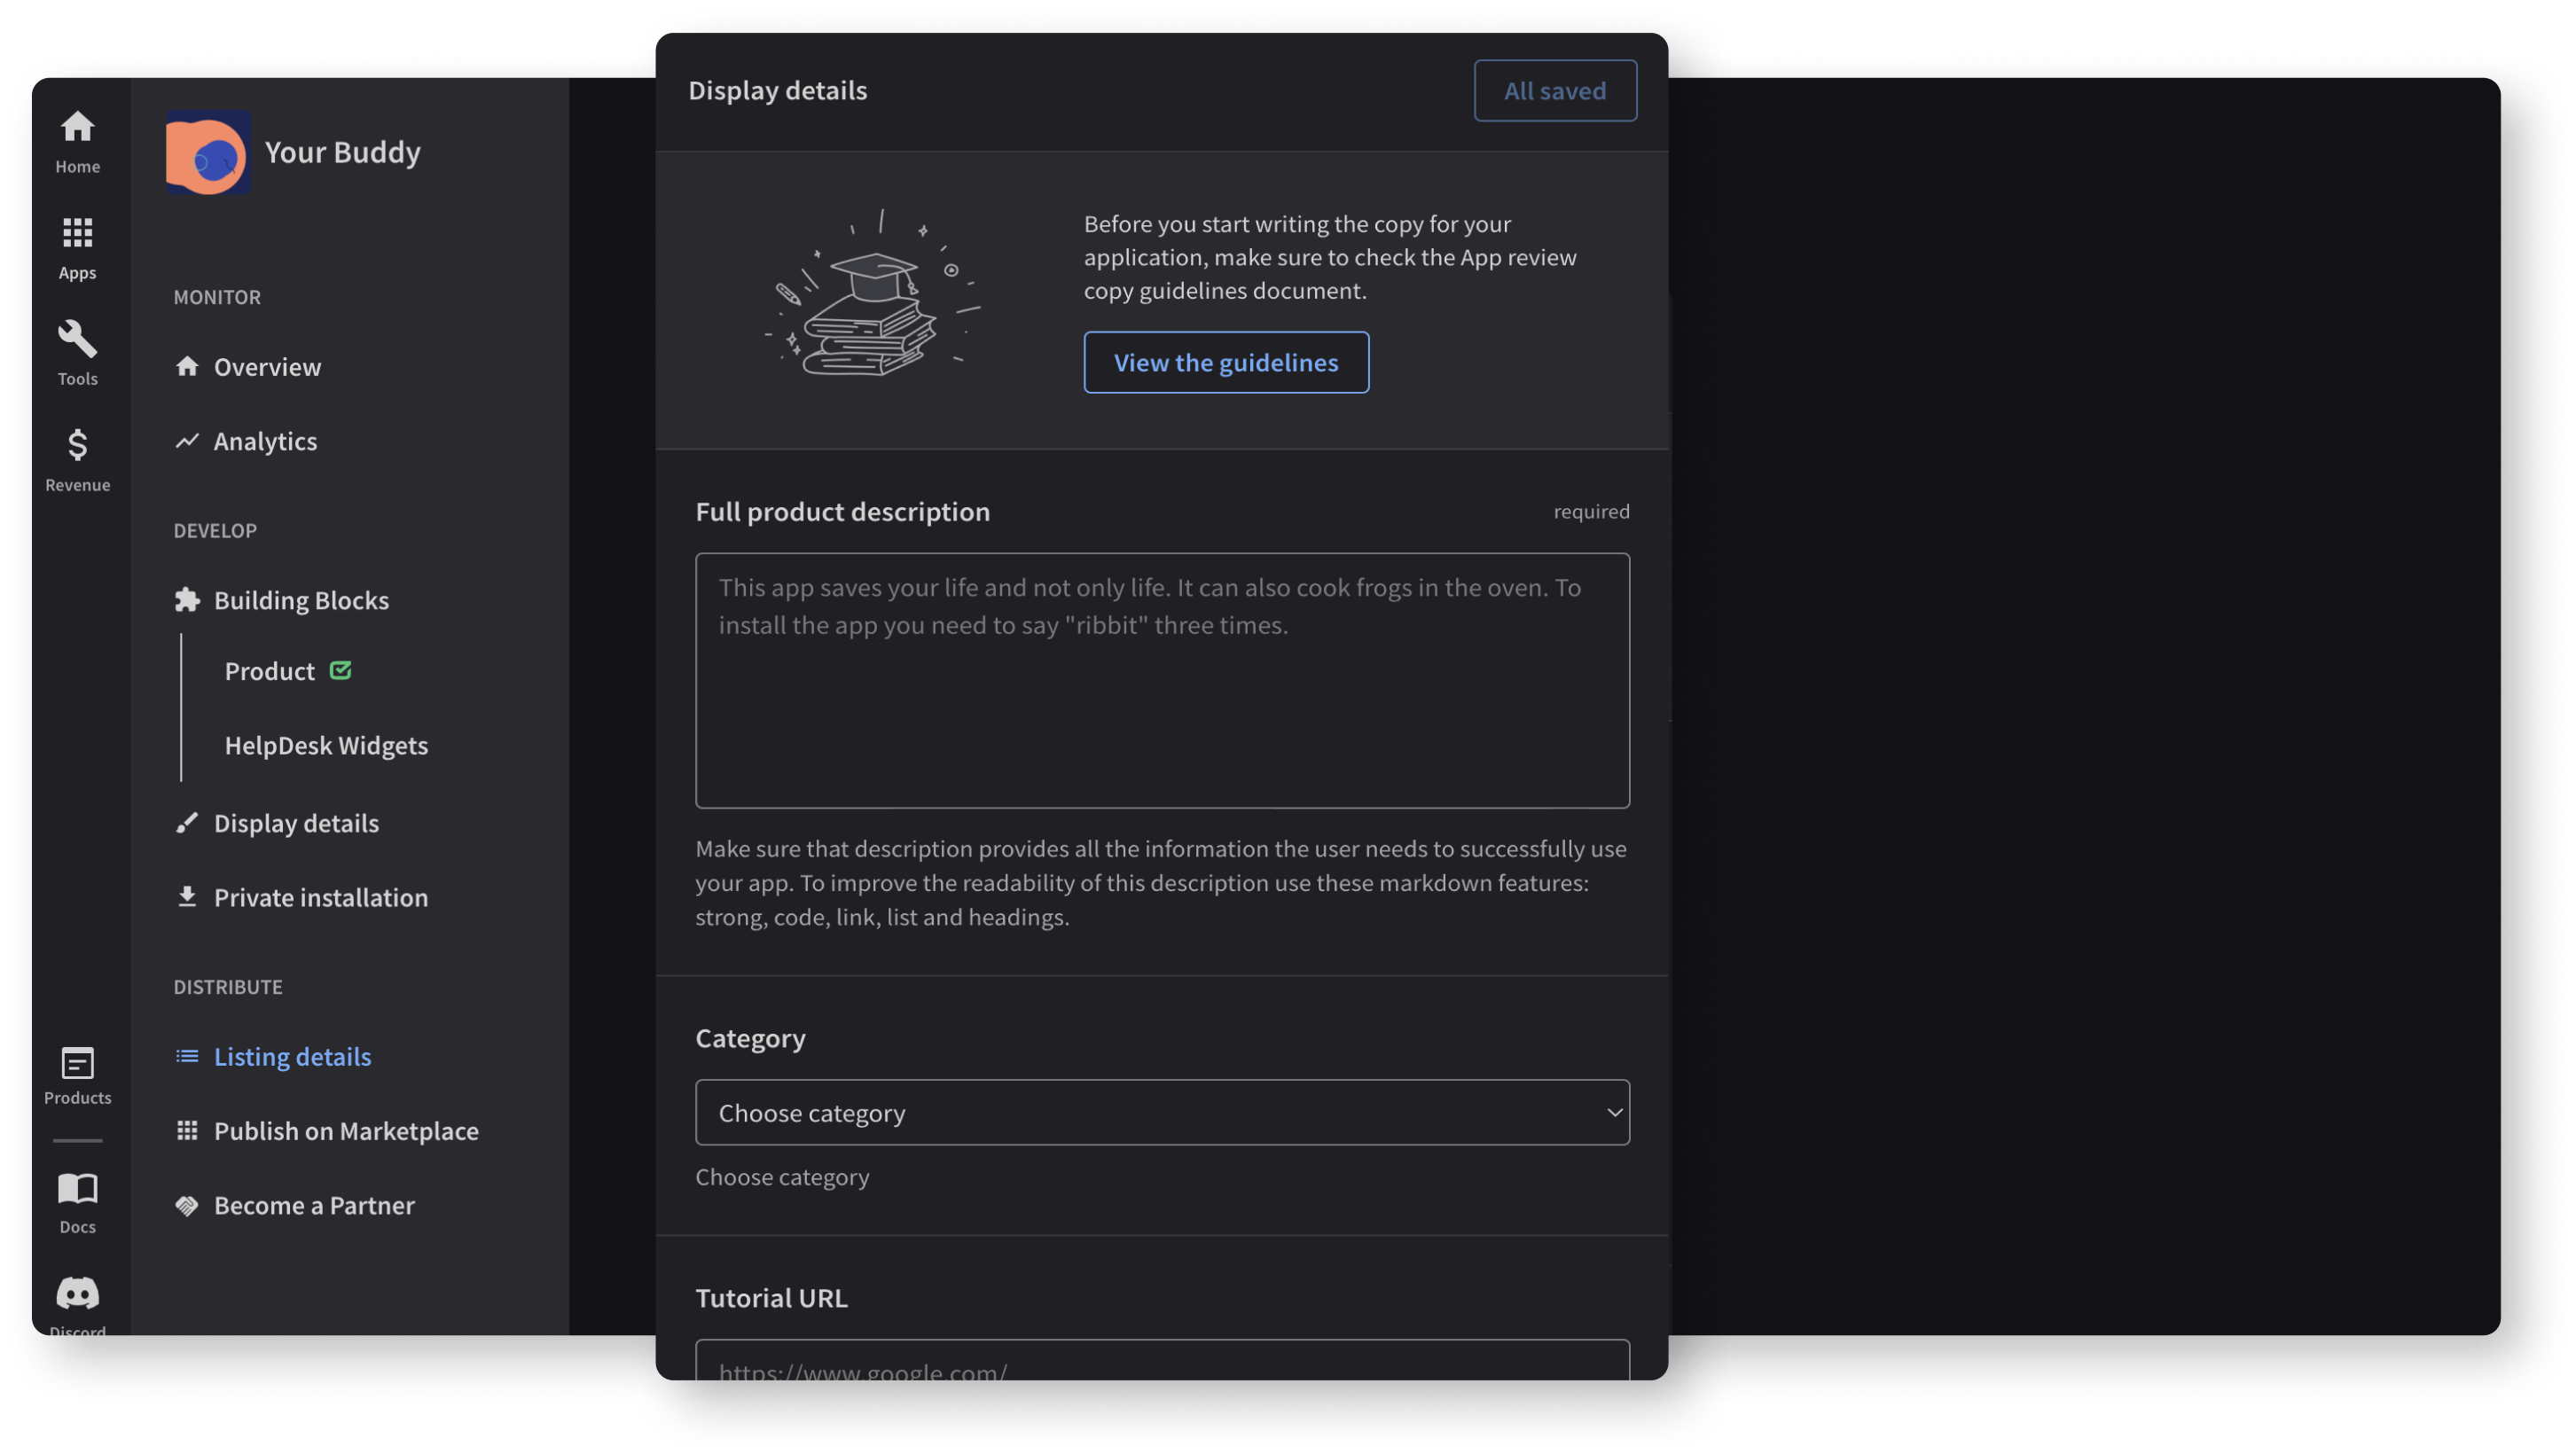
Step 5 Testing your application
Before you are able to publish your application on the Marketplace, you need to test it first to ensure that no bugs or errors appear.
To do that, you need to install your app privately on your license by going to the Private installation tab and clicking the Install app button.
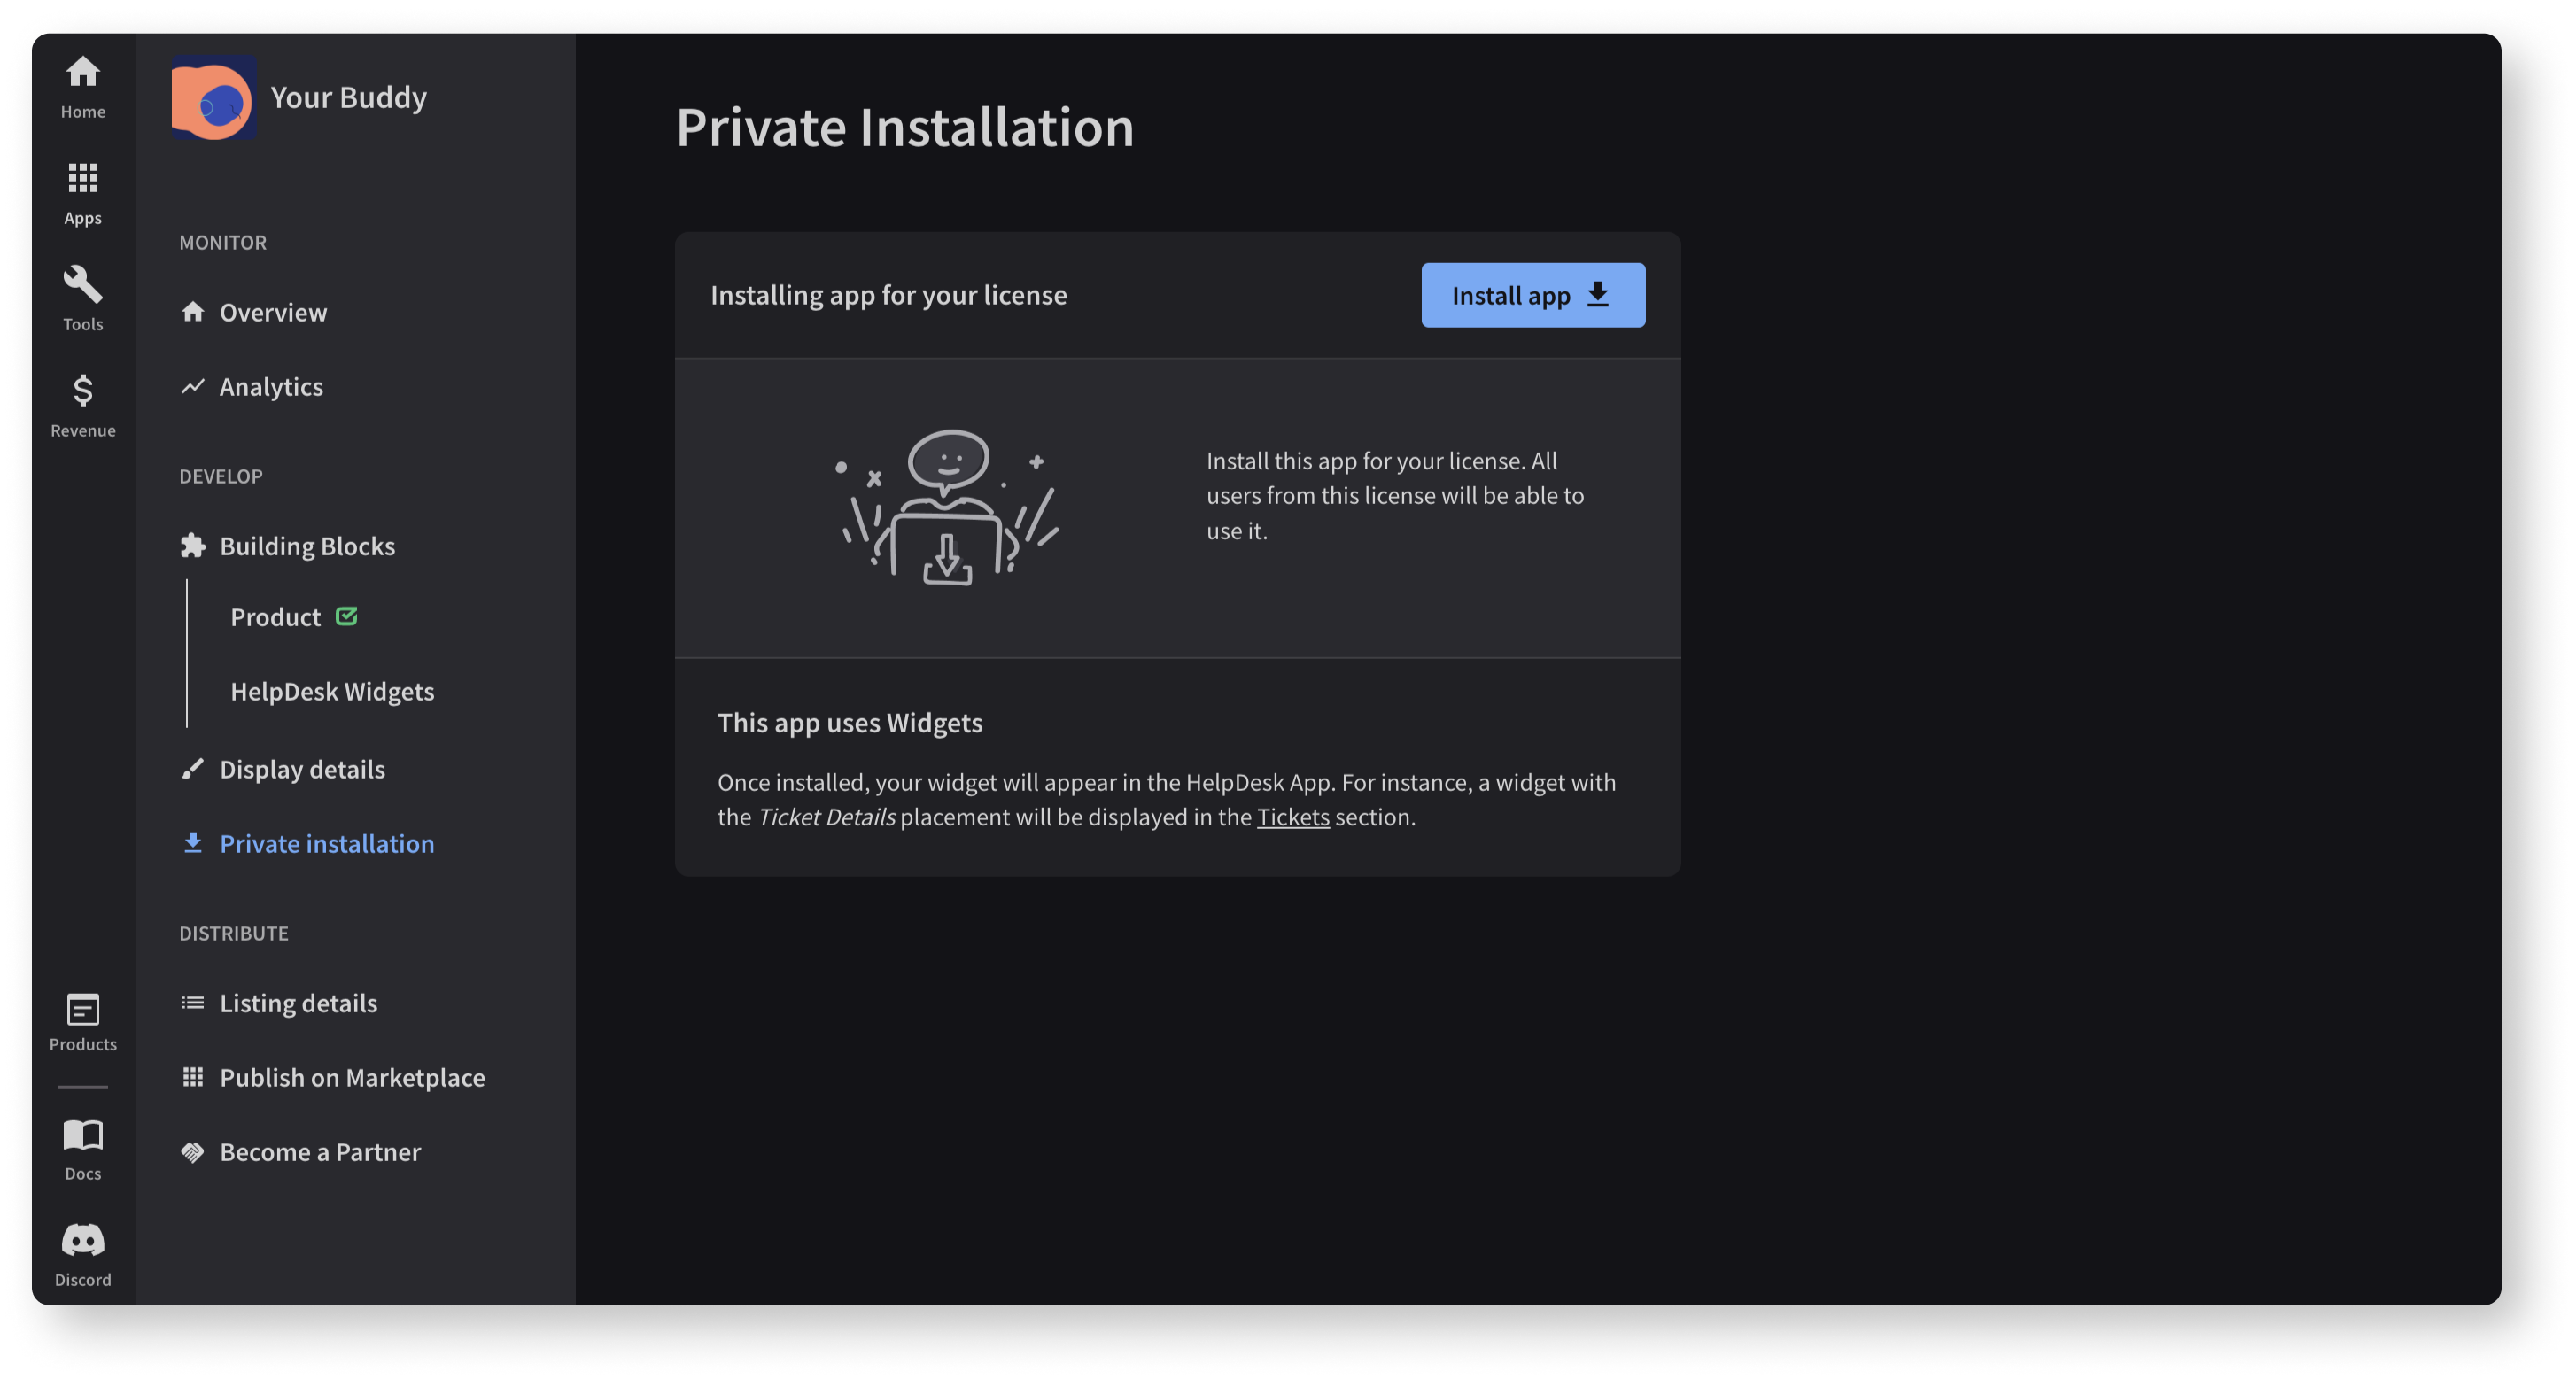
When the installation is done, you can return to your HelpDesk App and refresh the page. After doing that, you’ll see your widget.
Please remember that your widget placement in the HelpDesk App will depend on which widget placement you've chosen while creating the new HelpDesk Widget.
💡 Take a look at things to remember when testing the app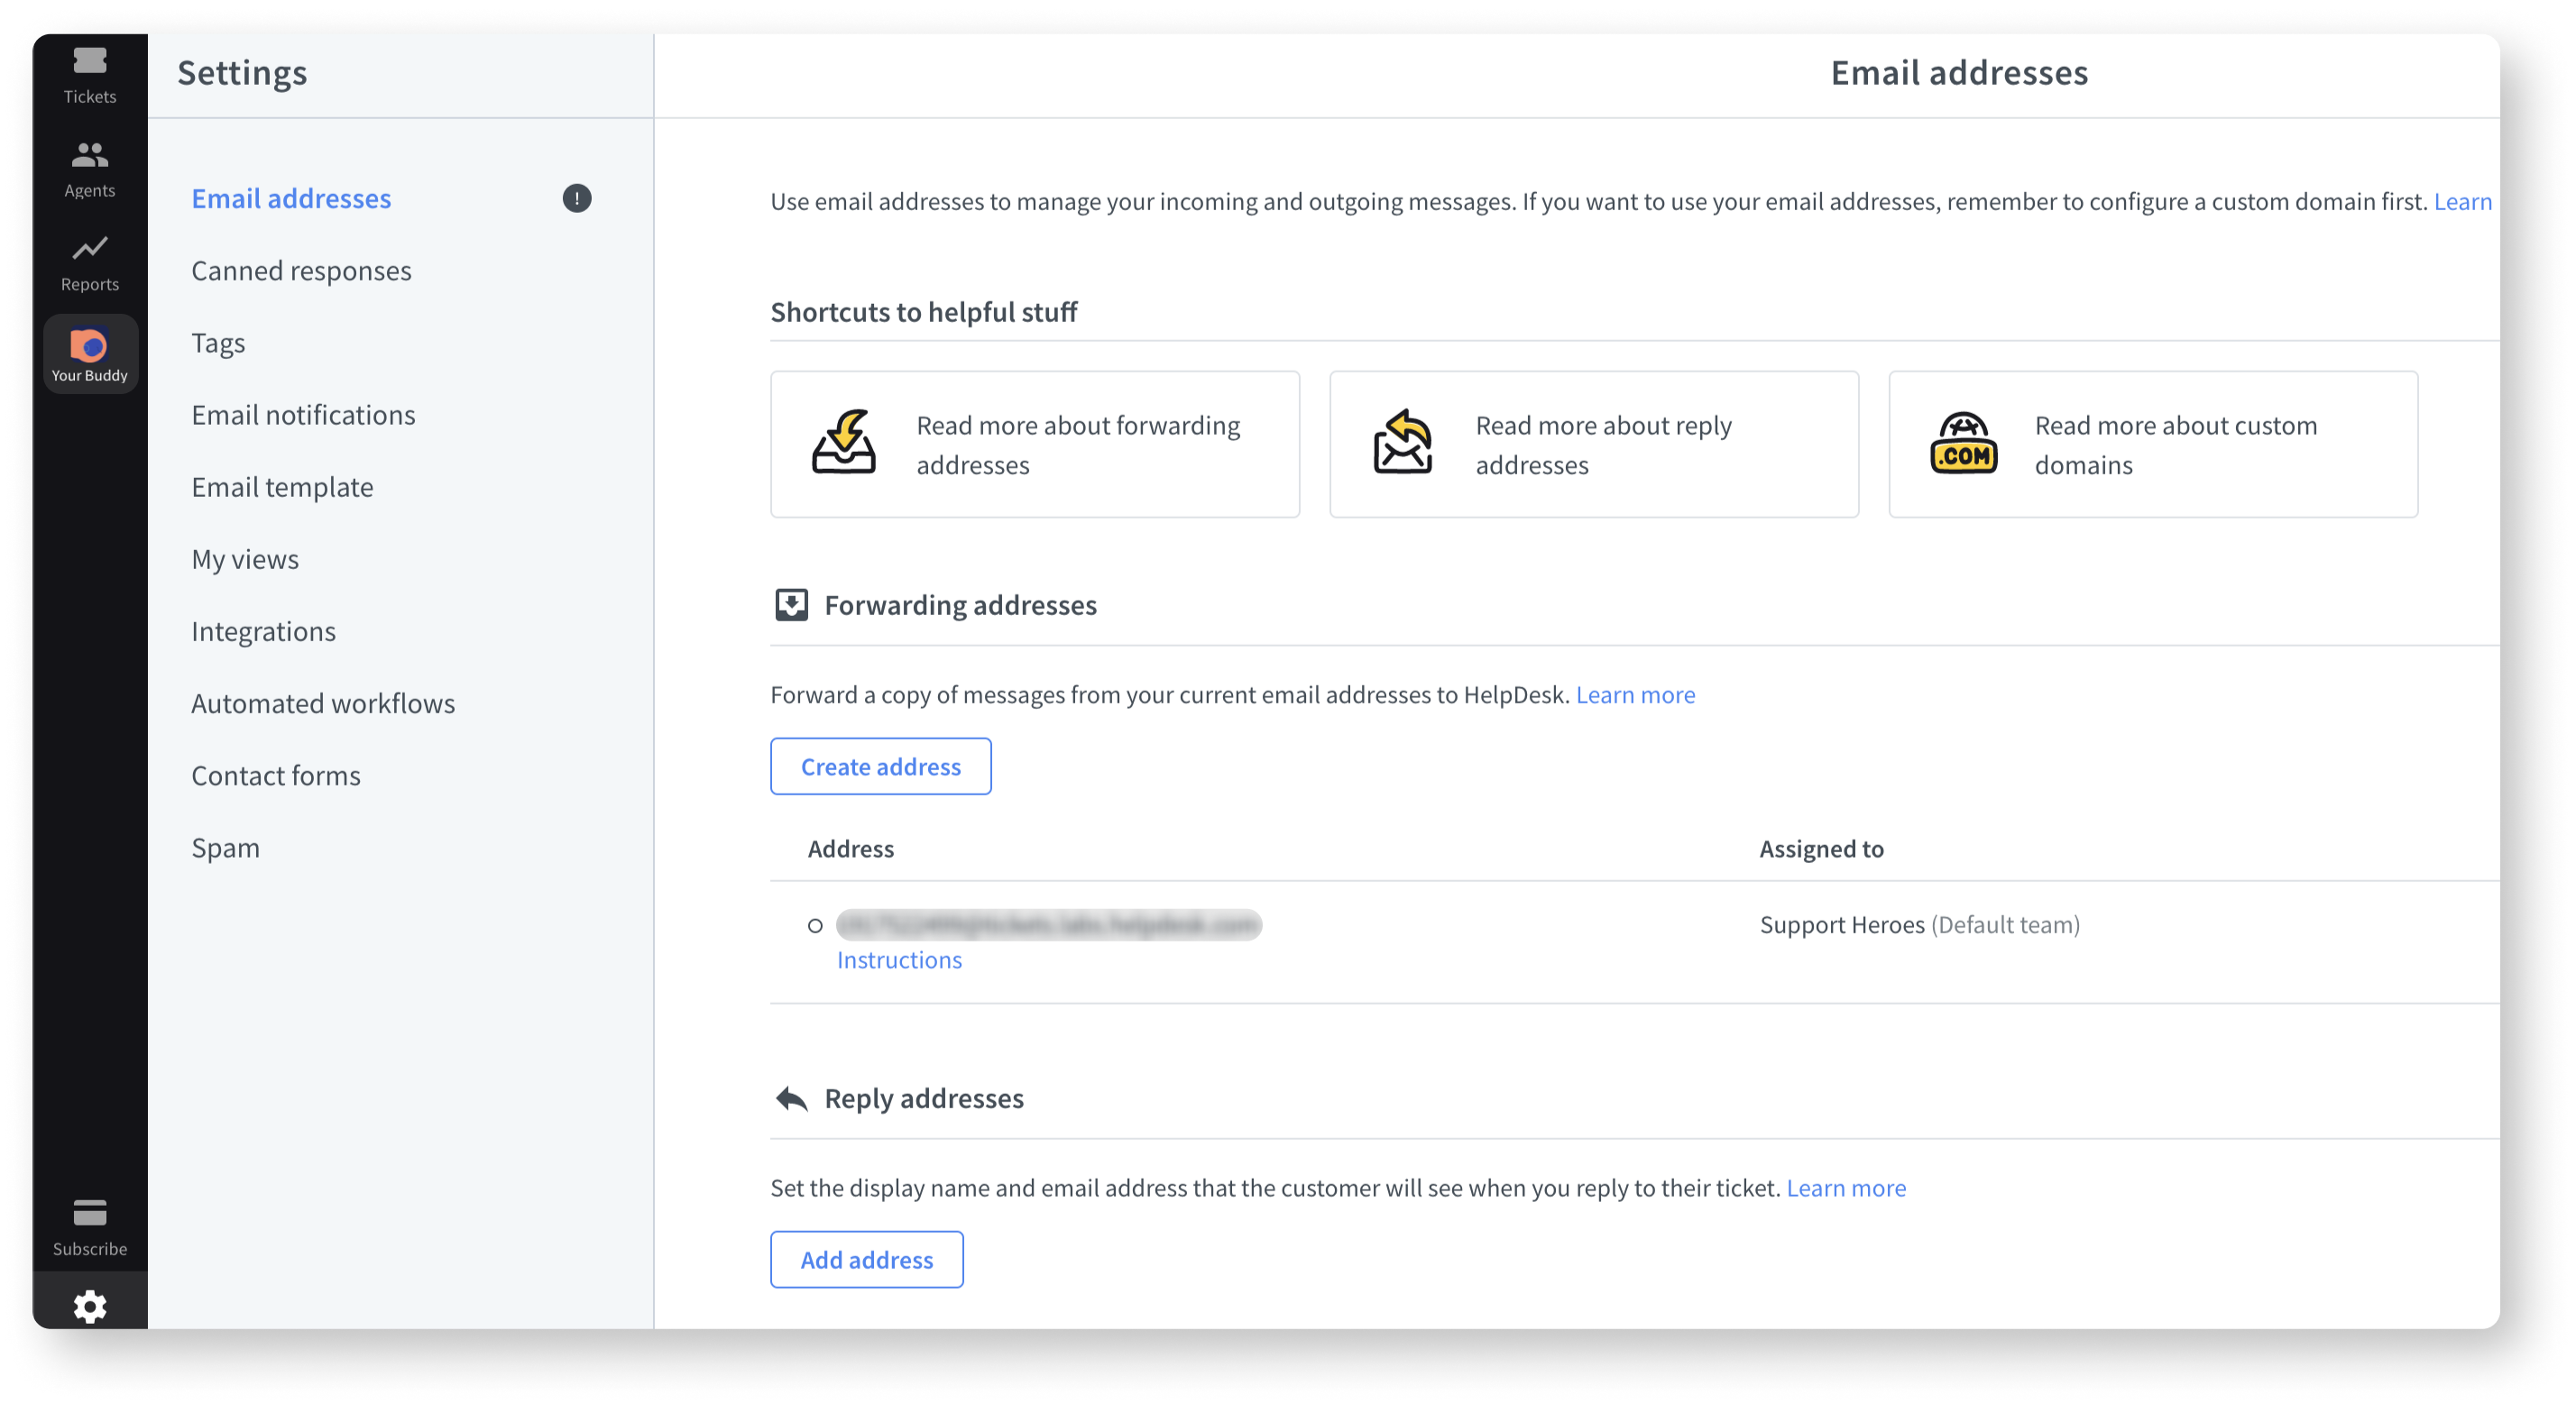
Congratulations! Now, you can enjoy your simple application under your license. If you want to build a public app, please go to the app review process page, where you’ll get all the necessary details on this process and find out how to submit your application for review.
If you need help along the way, you can always reach us at developers@text.com.