Chat Webhooks
Introduction
This document explains how to configure the Chat Webhooks building block in Developer Console. It was written for everyone aiming to configure webhooks in their integrations via user interface instead of calling the LiveChat Configuration API directly. The document assumes you're already familiar with the general idea of webhooks.
Keep in mind that the Chat Webhooks building block allows you to configure the license webhooks, and that is what this document focuses on. The document doesn't apply to the bot webhooks.
Tutorial
This tutorial presents how to build a simple application with the Chat Webhooks building block. It also explains the configuration of all other parts that are required for the Chat Webhooks block to be functional. The tutorial applies to the new chat webhooks (v3.3 or later).
In short, you need to take the following steps:
The end result of this tutorial will be an application that receives webhooks whenever a pre-determined event occurs.
Before you start
Log in to Developer Console or create an account for free.
Step 1: Create an app in Developer Console
To create a new app, all you need to do is click Create new app+, come up with a name, choose the product you want to build for, and click Continue.
Then, if your app has the frontend side, add and configure the Agent App Widget building block. Skip this step if you're building a 100% backend app with no UI.
Step 2: Configure authorization
Why is it necessary? You're building an application that, once installed, will call the Configuration API to enable webhooks for a user's license. To perform this operation, the user needs to authorize your application first.
Configure the App Authorization building block
Go to Building blocks and select App Authorization. You'll be asked about the client type: JavaScript app or server-side app. Applications that make use of webhooks are usually backend apps, so choose the server-side app.
- Provide a Direct installation URL and add it to the Redirect URI whitelist.
💡 Watch our live coding session to learn more about the Direct installation flow or keep on reading.
Handle direct installation and authorization in your app
Usually, the authorization process starts in the LiveChat Agent Application when a user runs the app for the first time. With the direct installation flow enabled, authorization begins on the Marketplace. When a user installs your app, a pop-up with the LiveChat authorization flow appears, and the application asks for access to certain resources. Upon successful authorization, the user is redirected to the Direct installation URL, where they can, for example, do the initial app configuration. (It all depends on what you implemented.)
As a developer, you need to handle the authorization flow in your app. For a backend app, we recommend Authorization code grant, where your app exchanges code for token.
Step 3: Configure chat webhooks
Configuring chat webhooks in Developer Console is equivalent to calling the Register Webhooks method from the Configuration API. In both cases, all your registered webhooks will be automatically enabled for each license that installs your app and grants it access.
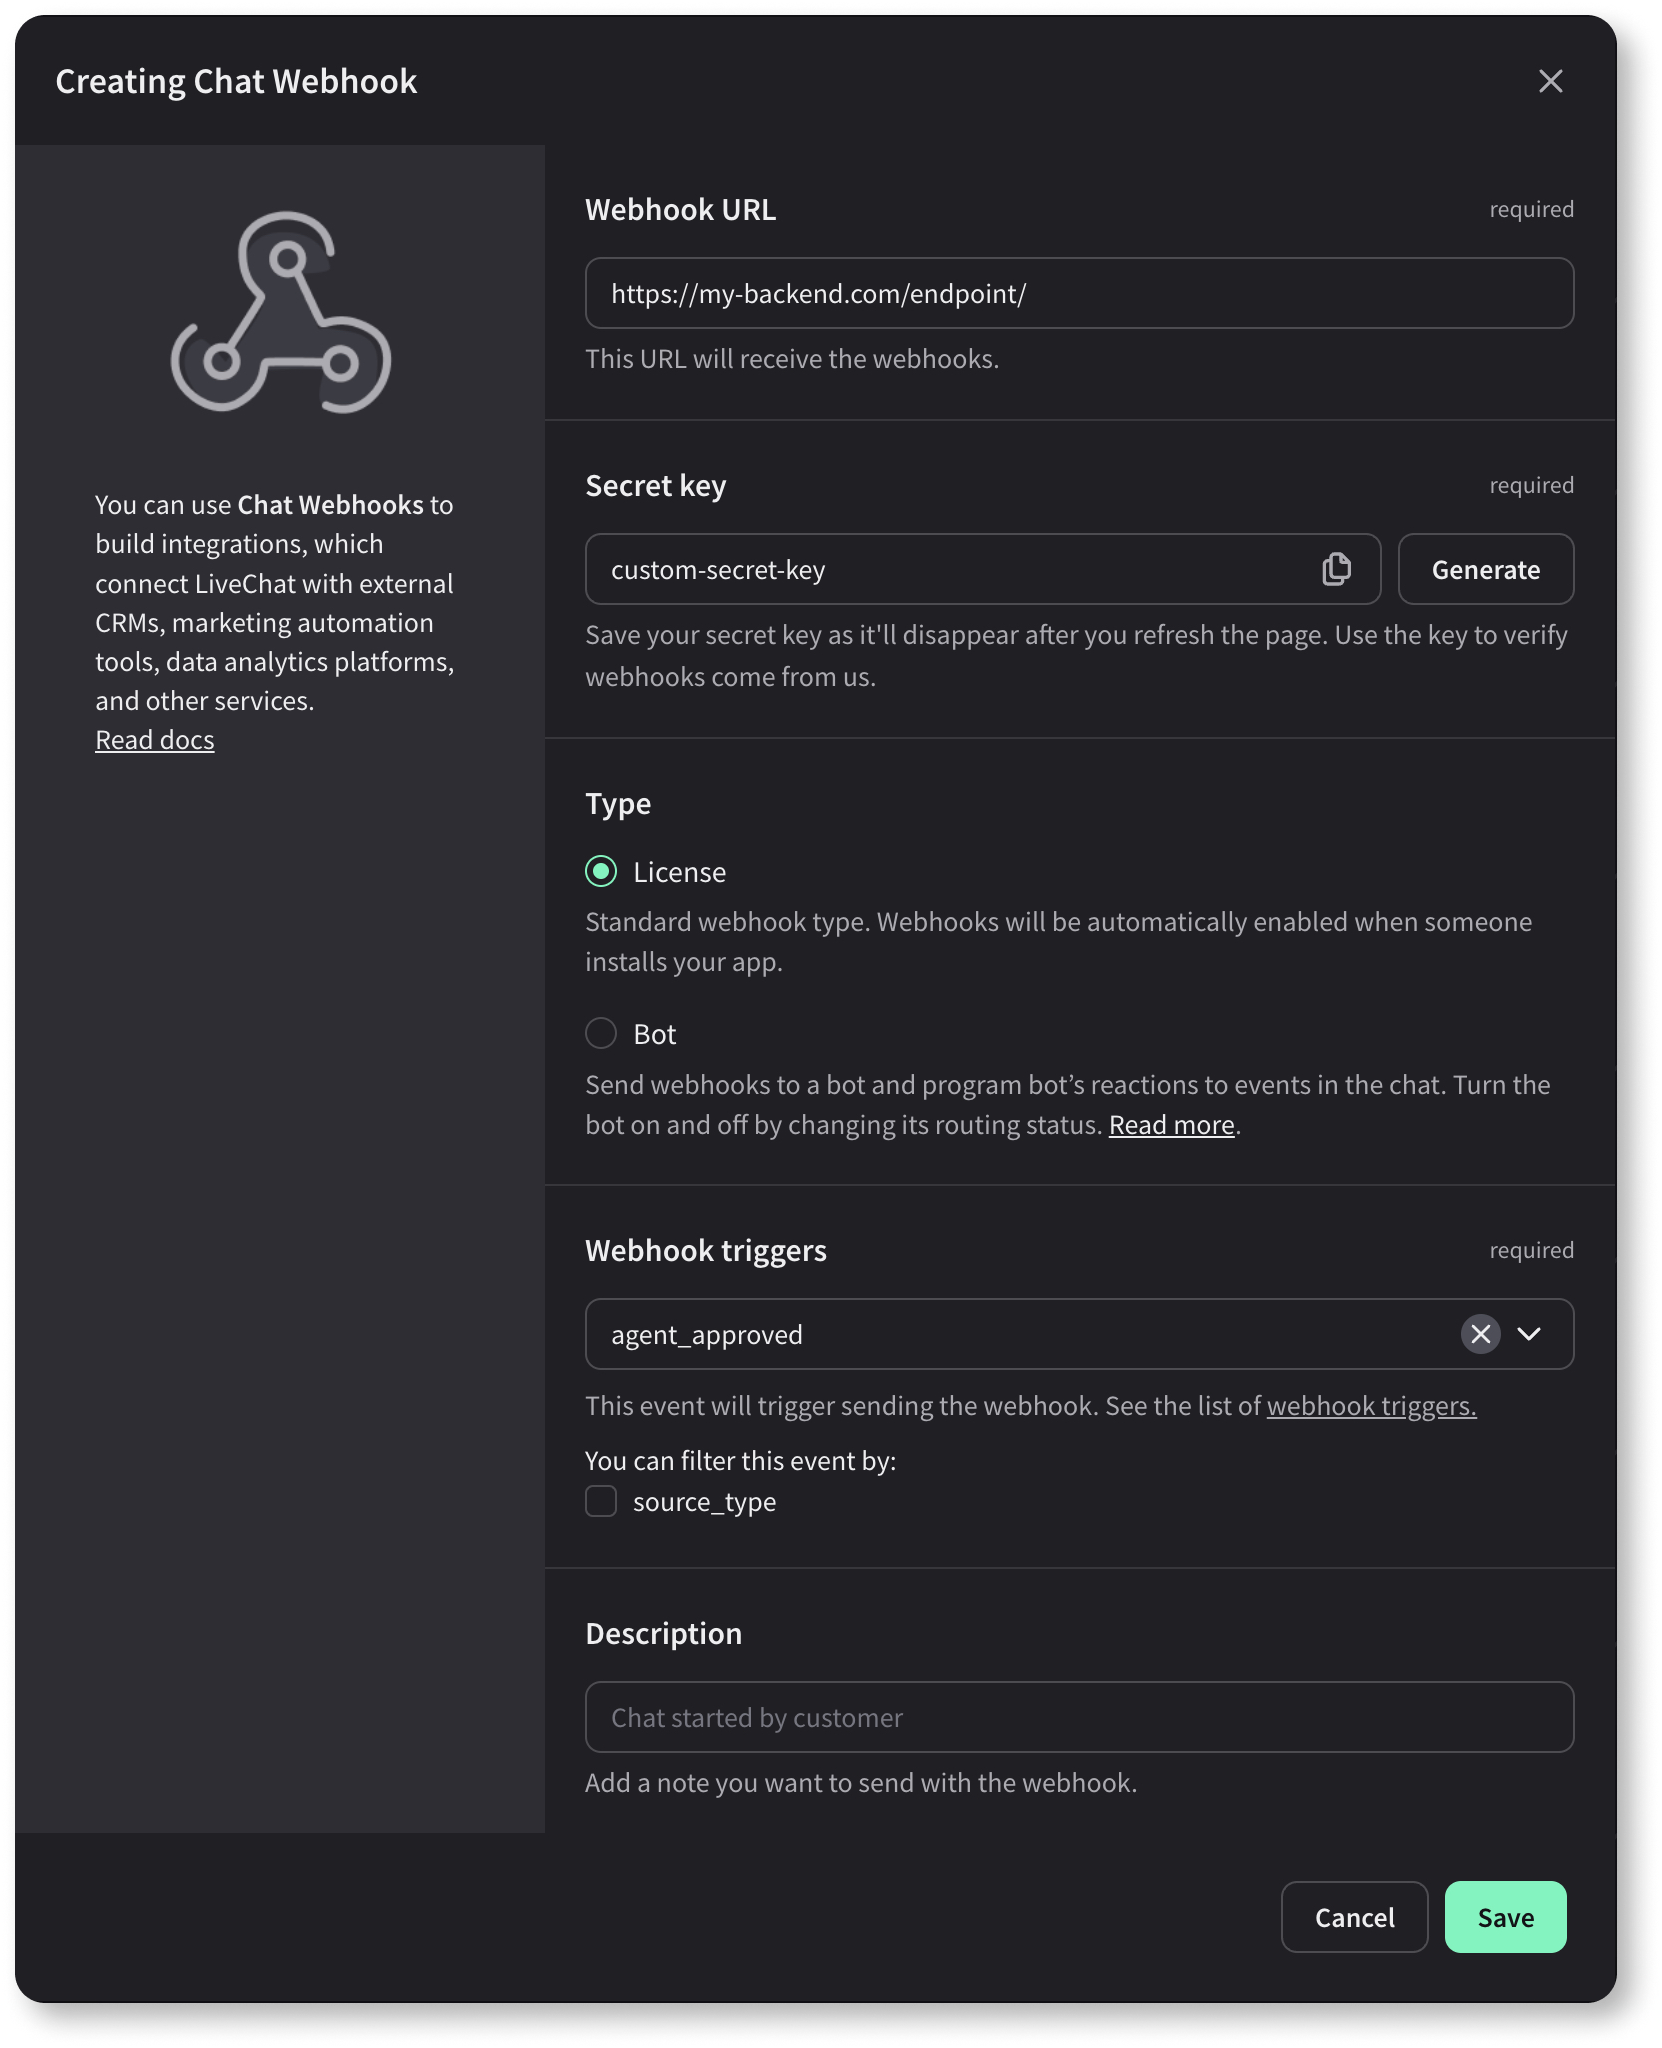
The configuration of the Chat Webhooks building block is a four-step process and involves the following aspects:

Once a webhook is added, you won't be able to edit it. If you need to make any changes to its configuration, you’ll need to re-register the webhook with the new settings.
Webhook URL
All the webhooks will be sent to the URL you provide in the Webhook URL field. That's likely the address of your backend service, but you can use https://webhook.site for testing. Each of added webhooks can be sent to a different URL.
Secret key
We'll include your secret key in the payload of each webhook. This way, your application can verify the webhooks came from us. Make sure you save the generated secret key as it will disappear after you refresh the page. If needed, you can always regenerate a new key or provide a custom one in the Secret key field.
Webhook type
You can select from two options: license or bot webhooks. Bot webhooks let you configure automated bots that react to specific events. This tutorial focuses on the license webhooks, but you can read more about bot webhooks in this tutorial.
Webhook triggers
Then, choose the webhook trigger, the action that will cause sending a webhook to the Webhook URL every time a specific event occurs. For the majority of events, you can also select a filter.

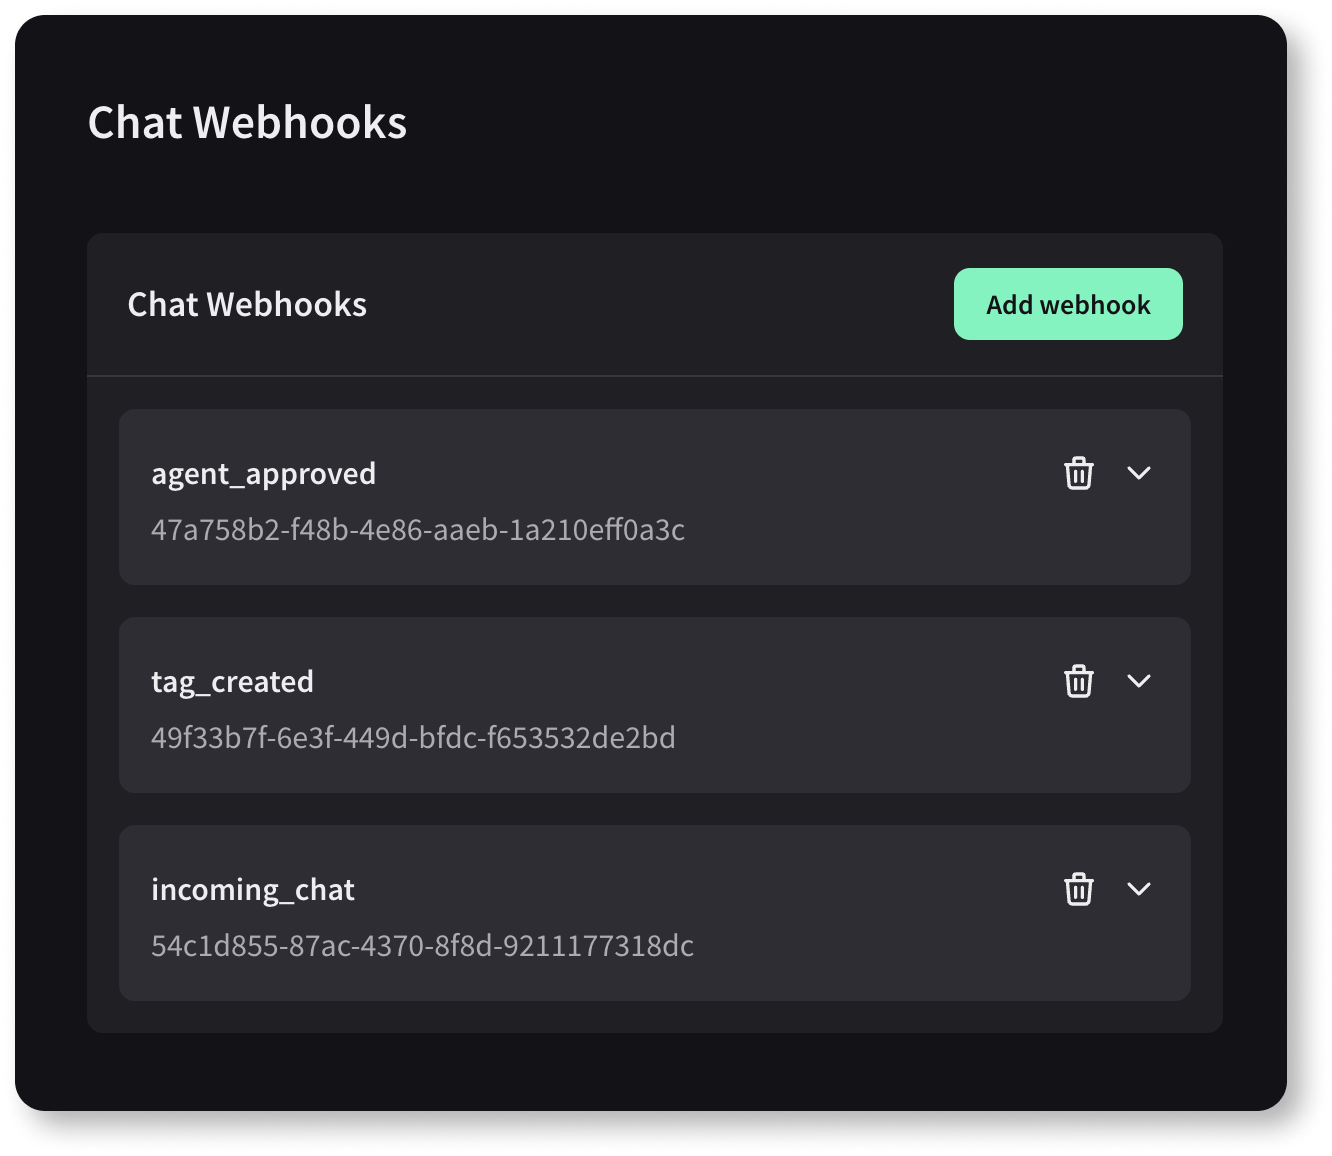
You can add only one trigger per webhook, but you can add multiple webhooks in one Chat Webhooks block. Each of the webhooks has its own ID.
End result
Thanks to such a setup, webhook will be automatically enabled for users who install your app from the Marketplace once it is published.
Testing chat webhooks
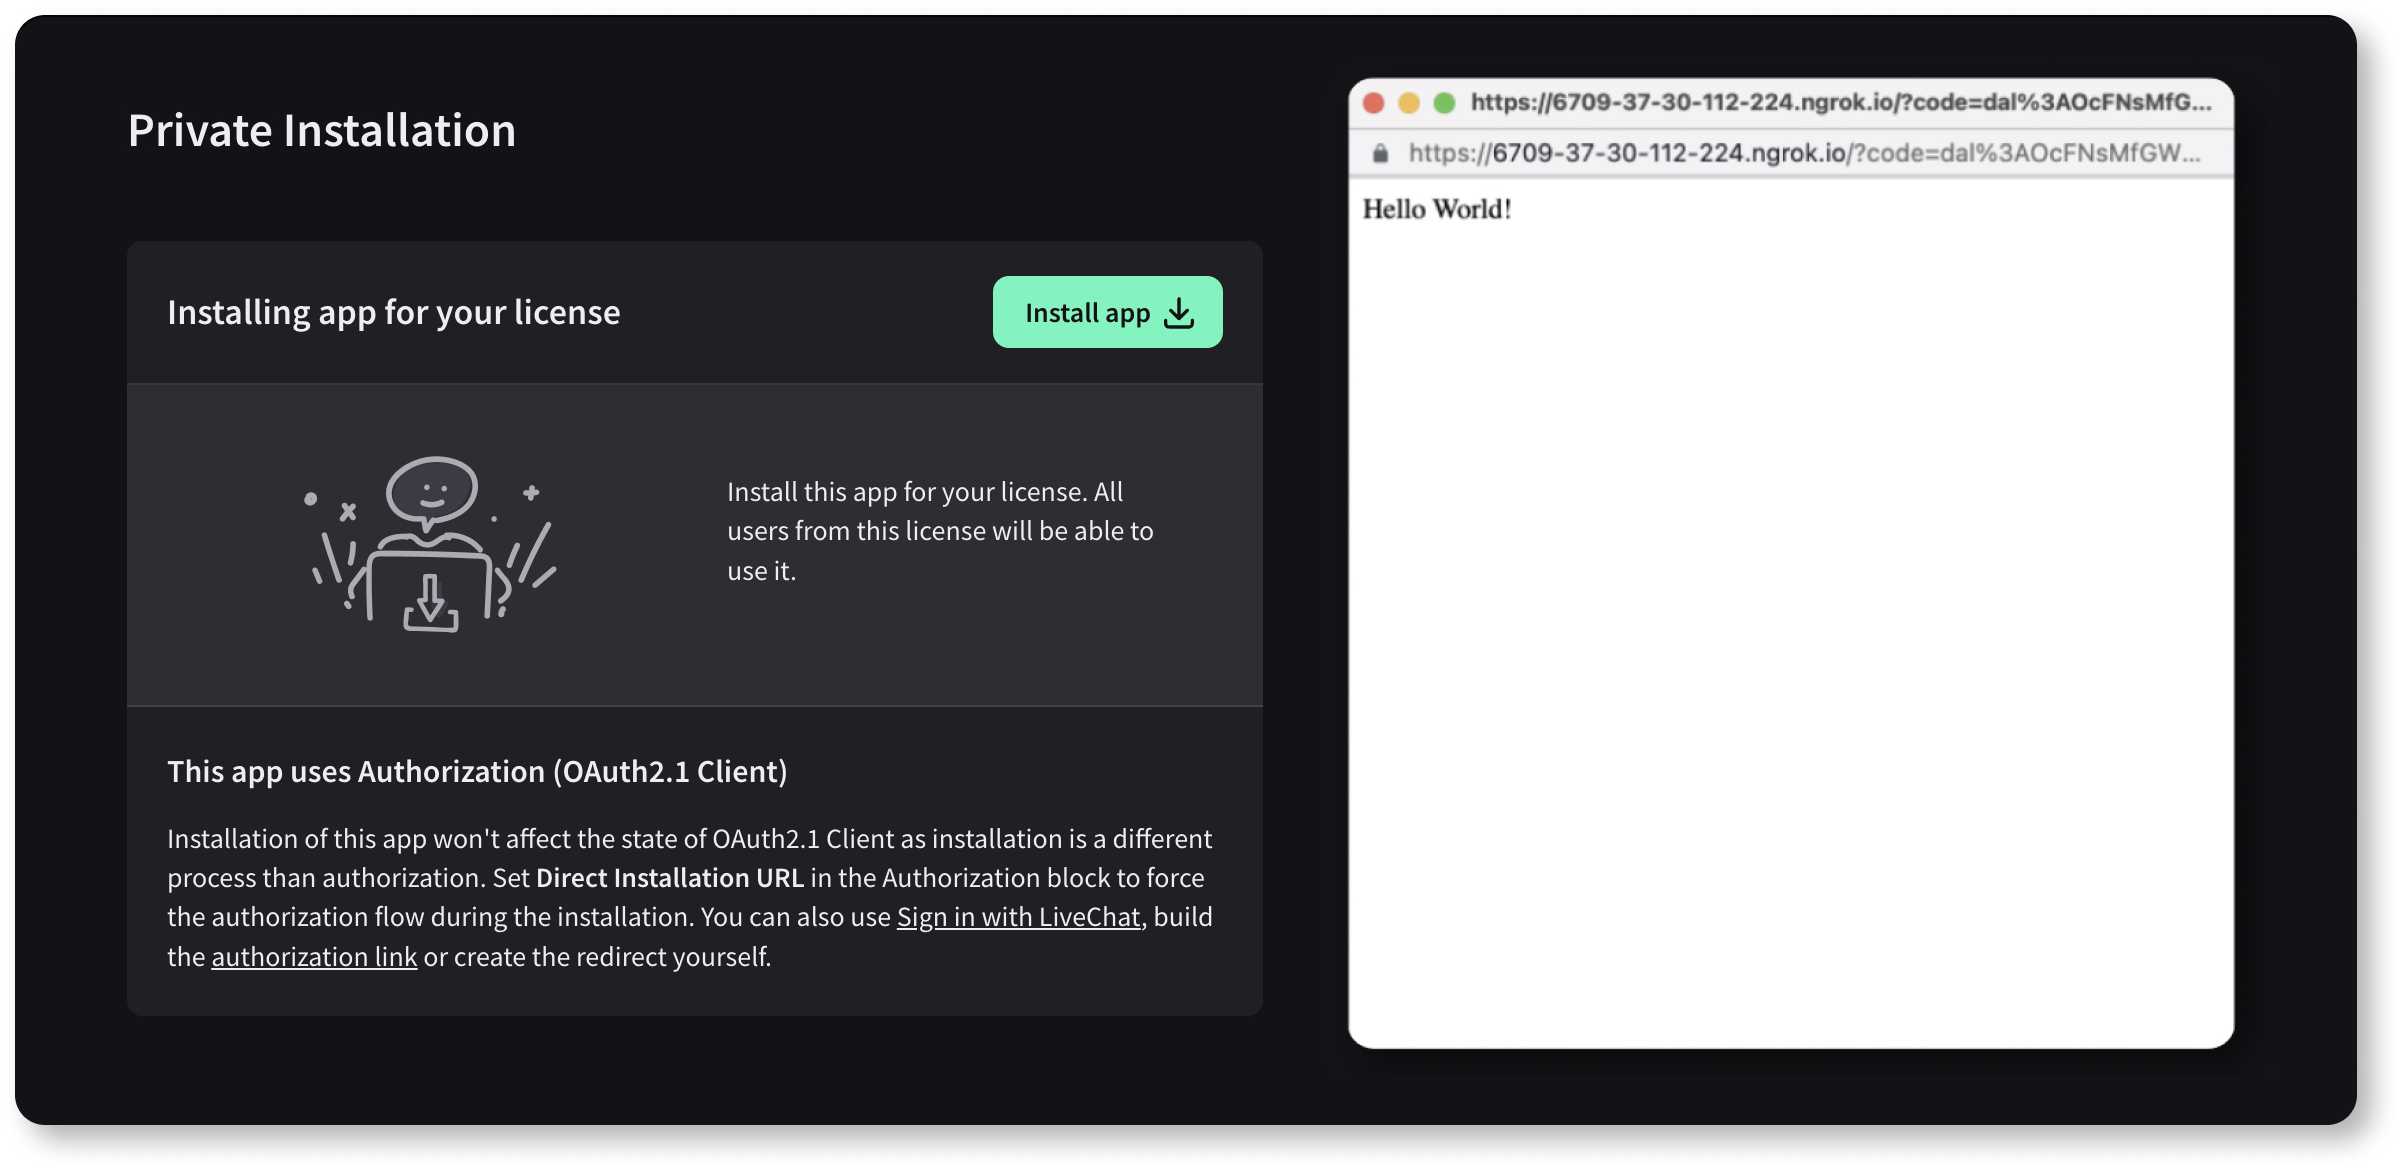
To test your webhooks, go to the Private installation tab and click Install app. If you used Direct installation URL, you'll see a popup window displaying the contents from your app (This is the stage of receiving code that you need to exchange it for token.) In production-ready apps, your app should automatically close the window when authorizing a user. Then, perform the action that's your webhook trigger, for example, start a chat if you selected the incoming_chat webhook.

Resources
Here's a list of useful resources related to webhooks:
- Webhook tutorial: What are webhooks & how to use them with the LiveChat API?
- LiveChat Configuration API
- Available webhooks
Contact us
If you have any questions or suggestions, feel free to email us at platform@text.com or ask on our Discord for Developers.